Settings
Freman allows the option to personalise the settings depending on customer requirements. From note templates, products & DGs, printers to colour schemes. The Settings will allow for distinct functionalities based on customer specifications. This section is divided into sections based on the functionality you are setting up.
Navigation
- Go to the ‘Admin’ menu
- Click on ‘Settings'
Overview
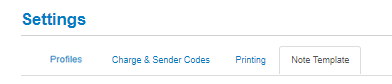
Different tabs run across the top of the screen depending on the type of setting you are altering or setting up for the customer. This section is broken up based on the different tabs found under the Settings page. The available tabs are listed below;
- Profiles
- Charge & Sender Codes
- Printing
- Note Template
- Dangerous Goods
- This will be available if enabled by your Mainfreight Sales Reps
In each tab, there are instructions on the right hand side of the screen as well as handy tips and tricks.
Profiles
The profile section is used to allow for multiple note templates under the one login information. For example if you have a distribution centre in Auckland, Christchurch and Wellington, but only wish for one login. You can set up three different profiles that have their own default note template and settings. One ex Melbourne, Adelaide and Sydney. This allows for faster consignment note creation for our customers.
Freman will automatically create a ‘Default’ profile, this can be updated and changed, but cannot be deleted. There must always be one profile per Freman login.
Overview
- Using the blue bar on the top left, you have the option of how many different profiles will appear on the screen at a time, these options; 5, 10 or 20.
- A search filter is available on the top left, this will search for all or part of the Profile Name
- Name
- This will be the name of the profile
- Colour
- Each profile can have a specific colour associated
- Last Modified
- Will identify when the profile was last updated either in name or colour
- Edit
- You are able to edit the profile settings by clicking the the
 symbol
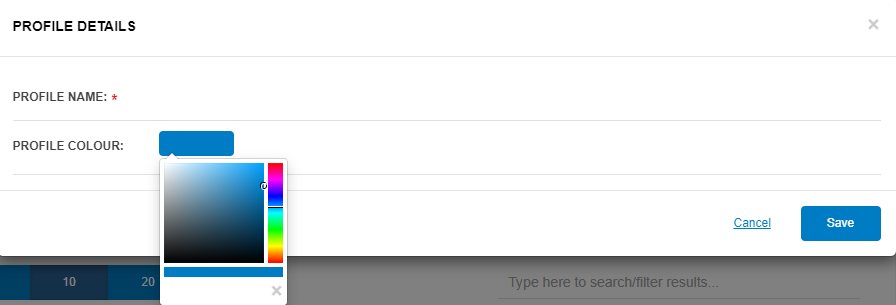
To Create a New Profile
All compulsory fields with red underline and red * must be completed for a profile to be saved
- Click ‘New’
- A lightbox will appear with the following information required;
- Profile Name
- Description or title of the profile.
- Eg, Customer is based in Auckland, so default profile will be set up or ex Auckland consignments. They have a warehouse in Tauranga that also sends deliveries out, so the additional profile might be ‘Tauranga Transfers’ and the note template set up with a specific default sender.
- Ensure these are as clear as possible for the customers
- Profile Colour
- Each profile can have a colour associated with it which will alter the top bar of the page, so you can see which profile you are currently using
- Click 'Save' to save the new profile
- Click ‘Cancel’ to leave the new profile details page
Editing an Existing Profiles
- Last Modified
- Will give you an overview of the last user, the date and the time this Profile was last updated or changed in any way. Time will default to the specific country you are in eg AUS or NZ time.
- Edit
- By clicking the symbol, you will be able to drill into the profile and make additional modifications to the name and profile colour
Charge & Sender Codes
Specific Charge and Sender codes are what your Sales Reps have set up for you can be set up against customers in order to save customers time and improve entry of consignments. This is read-only and you will not be able to change or edit charge or sender codes. If any of the listed details are incorrect, contact your Sales Reps to have the details amended.
Overview
- Using the blue bar on the top left, you have the option of how many different Charge & Sender codes will appear on the screen at a time, these options; 5, 10 or 20.
- A search filter is available on the top left, this will search for all or part of the Charge & Sender Code
Printing
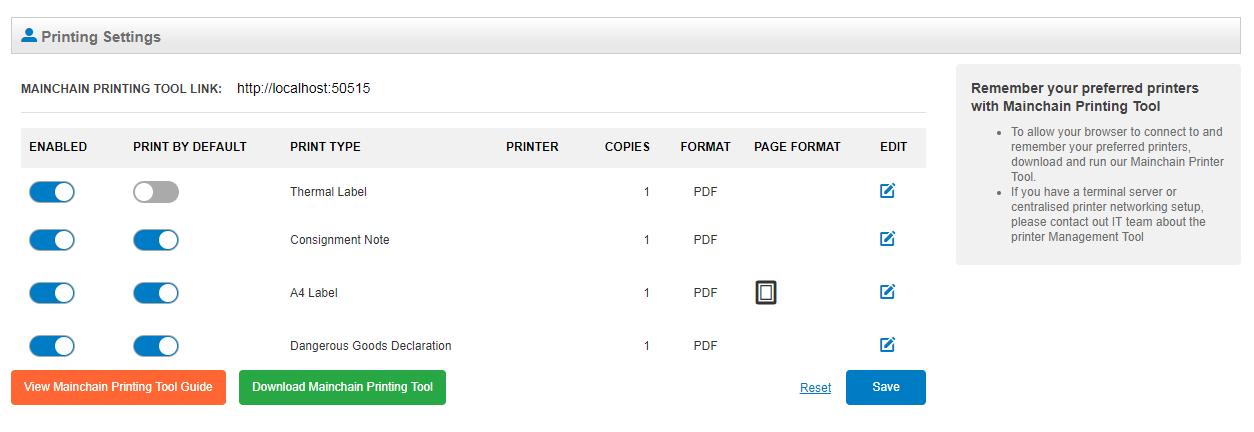
The Printing tab is used to set up default printers for you to print consignments and label. When creating a consignment note, the system will automatically be able to send the information to your printer.
Overview
- You can view the settings and use the toggles to enable different functions for each printer used for a consignment
- Enabled
- These are the labels that have been enabled or disabled to print as you create a consignment
- You can click the toggle to enable or disable certain printers
- Print by Default
- This gives you the ability to automatically print labels when creating a consignment
- You can click the toggle to enable or disable the ability to print by default
- Print Type
- These are the different labels that can be printed for your consignments;
- Thermal
- Consignment
- A4 Label
- Dangerous Goods Label – this will only be available if enabled by your Sales Reps
- Printer
- This will show what printer is being used to print the labels
- Copies
- This is the number of copies being printed for a consignment.
- Format
- This is the document type for printing or if emailing the paperwork to an individual.
- This will default to a PDF format
- Page Format
- This is available for A4 label. T
- This will default to 1 label for A4 page
- Edit
- You are able to edit the printing settings by clicking the symbol
Mainchain Printing Tool
- This tool is designed to allow direct printing from your browser and remember your preferred printers when creating a consignment
- Please contact your Sales Rep to assist with installing this tool and setting up your printing settings
- You can click the buttons at the bottom of the screen to use the Mainchain Printing Tool Guide and to download the Mainchain Printing Tool
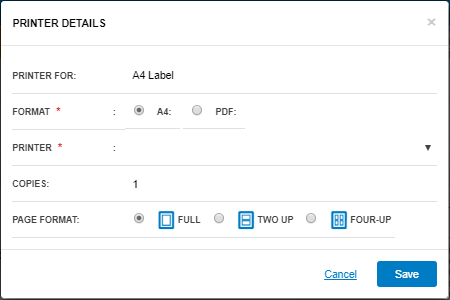
How to Change Printer Settings
All compulsory fields with red underline and red * must be completed for your printing settings to be saved
- Click the image to edit the printing settings for that Printer Type
- Select the printing format
- PDF – This will be the default format
- Datamax
- Zebra ZPL
- Zebra EPL
- Generic
- A4 – This will be the only alternative option for the A4 Label Printer Type
- Once a format that is not PDF is selected, you can select the printer machine to where your labels will be printed
- If the printer is not available on your list, you will need to check that it has been set up on your PC
- Enter the number of copies you wish to print for that Printer Type
- This will default to 1 copy per label, you can adjust this to print multiple copies
- Page Format
- This will only be available for the A4 Label Printer Type
- You can select how many labels you want to print on one A4 label
- Click ‘Save’ to save printer setting changes
- Click ‘Cancel’ to delete all details
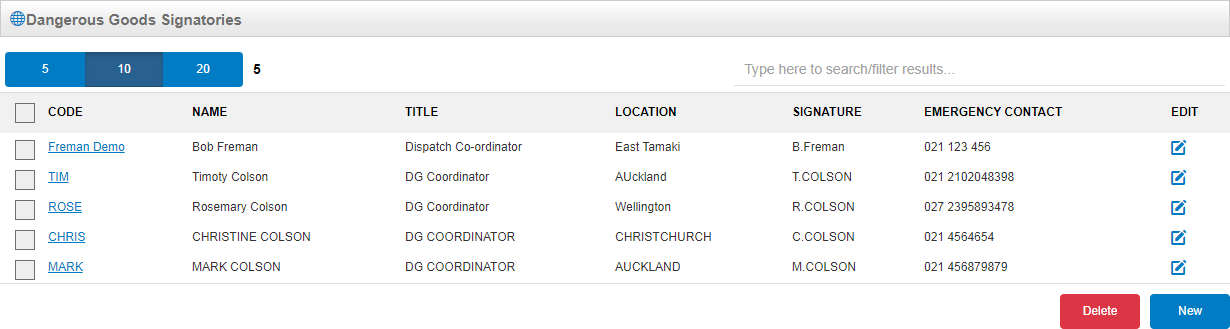
Dangerous Goods
The Dangerous Goods tab is used to create and control your DG signatories used for consignments moving DG freight. It is important that you are using the correct DG signatory for the DG declaration to confirm the details are correct for the freight that is being moved. This tab will only be available if enabled by your Sales Rep. If you require to move DG freight, please contact your Sales Rep.
Overview
- The blue bar gives you the selection to view your list of DG signatories in groups of 5, 10 or 20. You can also choose the size of the DG signatories list by using the up and down arrow next to the blue bar to find your preferred size, or by typing in the number directly
- A search filter on the left allows you to search for a certain DG signatory
- You can select multiple DG signatories by clicking the tick boxes on the left hand side
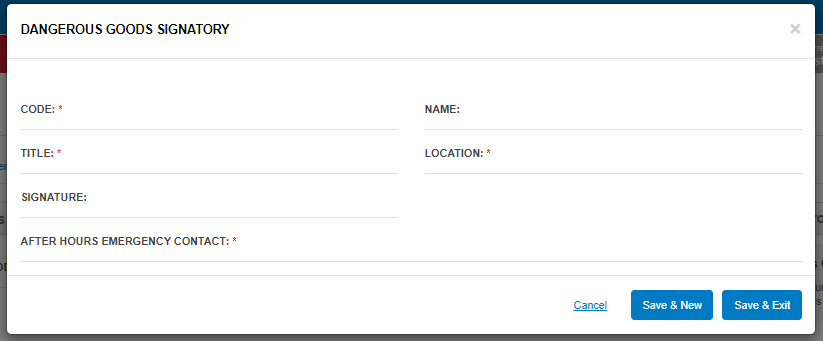
Creating a DG Signatory
- Click ‘New’ to create a new signatory
- Code
- This is the short code to recognise the DG Signatory
- Name
- The name of the signatory
- Title
- Role of the signatory in the business, for example: DG Supervisour
- Location
- Location of the person
- Signature
- This is the electronic signature to confirm the declaration
- You must follow the correct format for a DG signatory signature using first letter of the first name, a full stop and the full last name, all in capital letters. For example: Joe Bloggs’ signature will be J.BLOGGS
- After Hours Emergency Contact
- This is the best contact number of the signatory outside of the business number that can be contacted in emergencies
- To save:
- Click ‘Save & New’ to create multiple signatories
- Click ‘Save & Exit’ to review all signatories
- Click ‘Cancel’ to delete all details
Deleting a DG Signatory
- Select the signatory by clicking the tick box on the left hand side
- Click the ‘Delete’ button at the bottom of the page
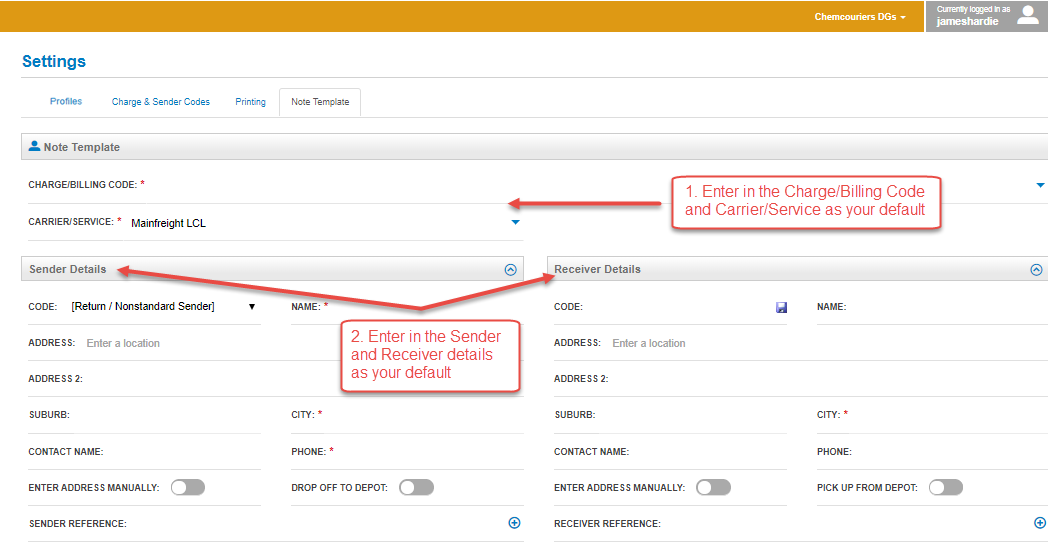
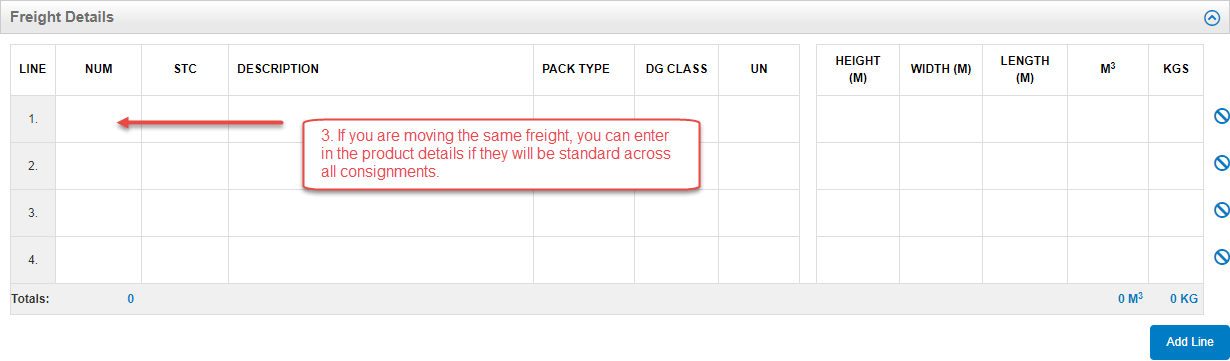
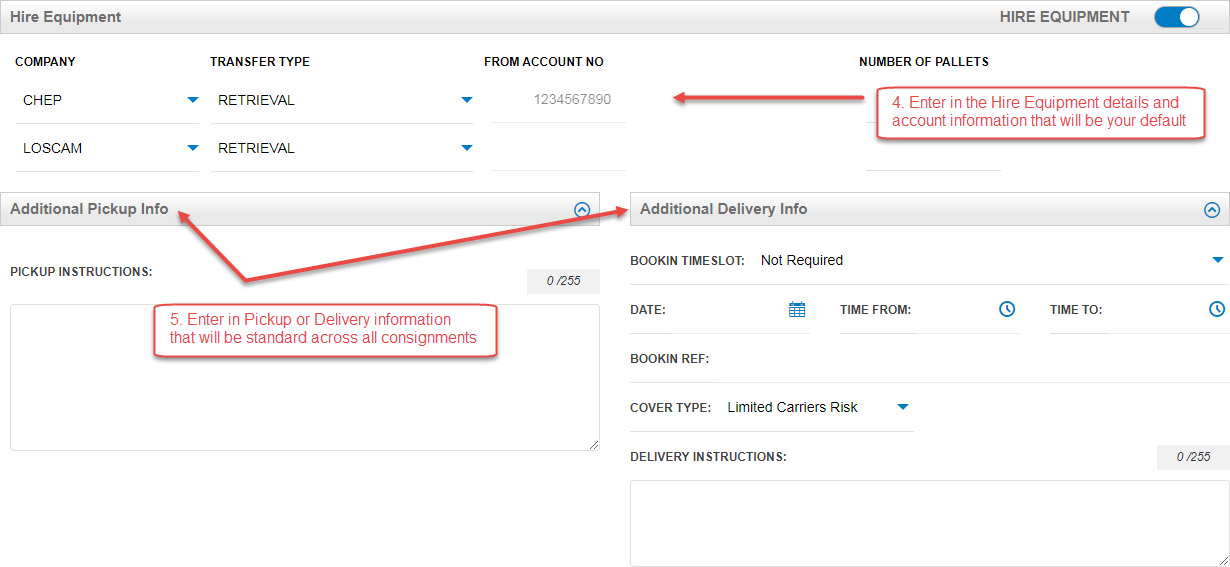
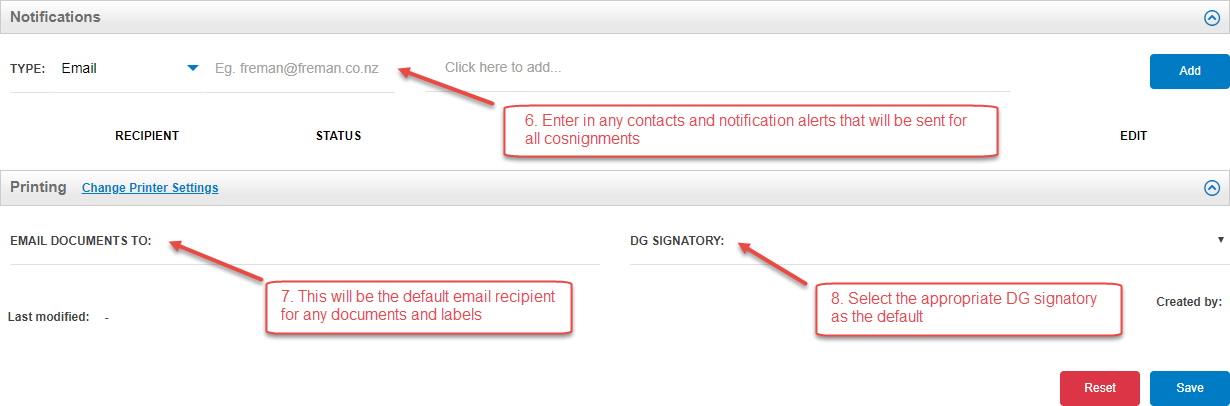
Note Template
The Note Template tab is used to set up the skeleton of the consignment note so that when details can be pre-saved and allow for faster entering of consignments. A Note Template can be created for each profile so you can save specific information for different profiles. You are still able to update and change information when creating a consignment as you need.
Overview
- The Note Template tab looks the same as the ‘Create New Consignment’ page
- All compulsory fields with red underline and red * must be completed for your note template to be saved
Creating a Note Template
- Select the correct profile you want to make a note template for
- Enter in the details that you want to be saved and present on the ‘Create New Consignment’ Page
- Click ‘Save’ to save the Note Template
- Click ‘Reset’ to clear all information
- Details that you save in the Note Template can be changed as you create a consignment