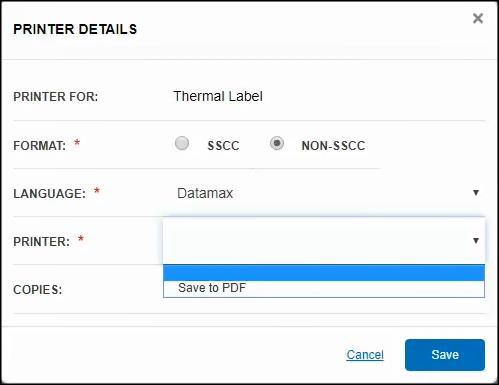
Freman can't see my network printers
Issue
When adding your printers in Freman, you may encounter an issue where it can't see your network printers with MPT running.
Cause
Specifically, your local printers (such as USB and PDF printers) are visible, but your network printers (such as Printer1 on Server1) are not visible in Freman. The reason for this is because you (a PC user) and your PC (computer hardware) view printers differently. We then need to make the printers visible to the PC hardware which will make them visible within Freman.
Steps
- 1. Identify your network printer's IP address / FQDN
-
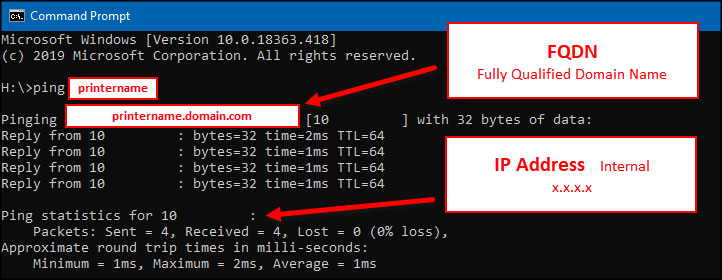
Ping your printer via Command Prompt
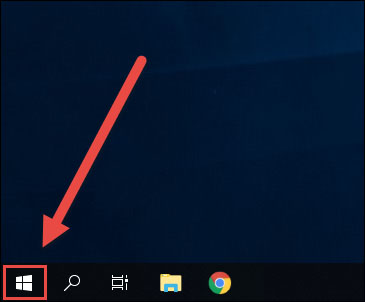
1. Click on the Windows start button.
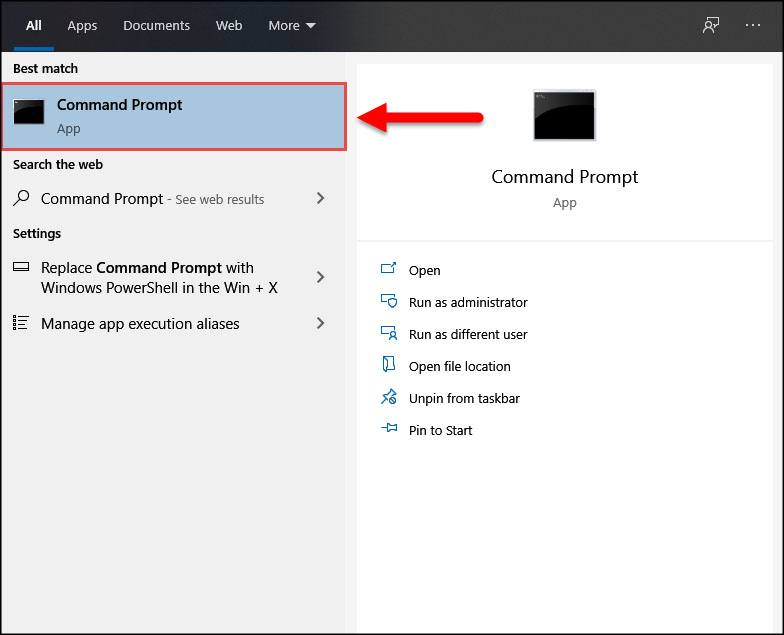
2. Type in Command Prompt and select the item to open.
3. Type ping printername. This will reveal either (or both) the FQDN or IP address for the printer. Whichever is noted this can later be used.
Check port within the printer properties
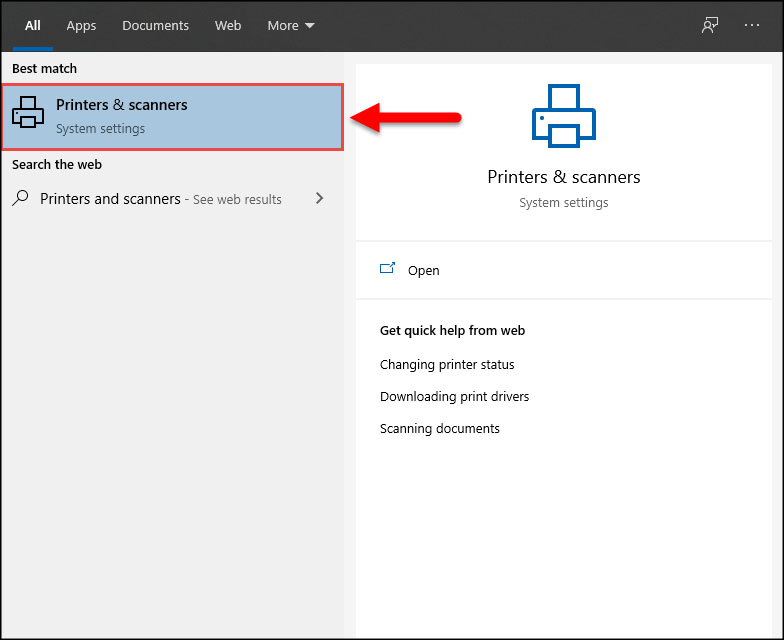
1. Click on the Windows start button.
2. Type Printers and Scanners. Select the item in the search results to open the window.
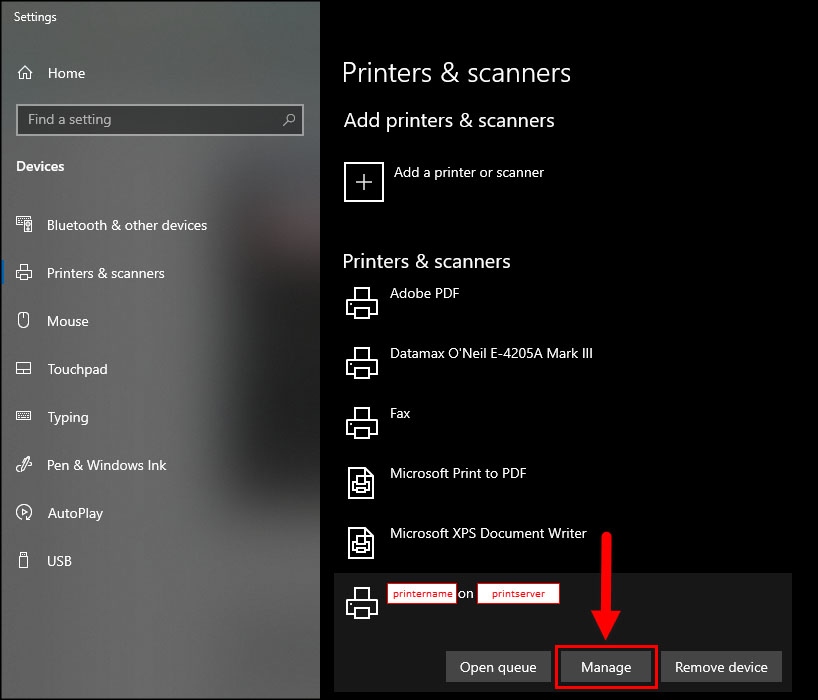
3. Select your printer in the list and click [Manage].
4. Click [Printer properties].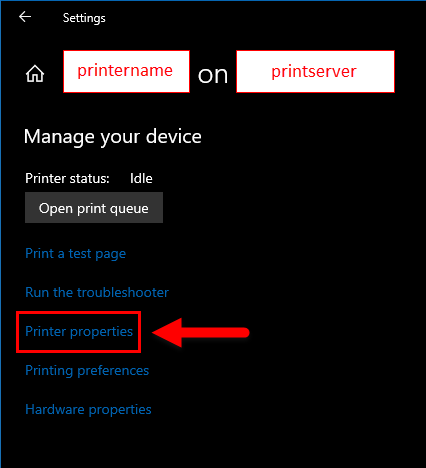
5. Click [Ports].
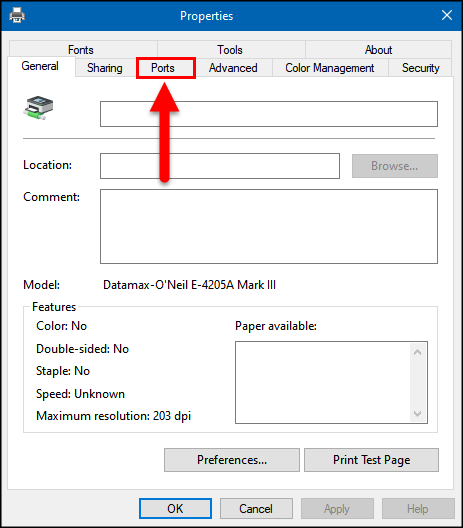
6. Under Ports, you will find the printer in question (eiether the FQDN or IP address). Whichever is noted this can later be used.
- 2. Add Printer
-
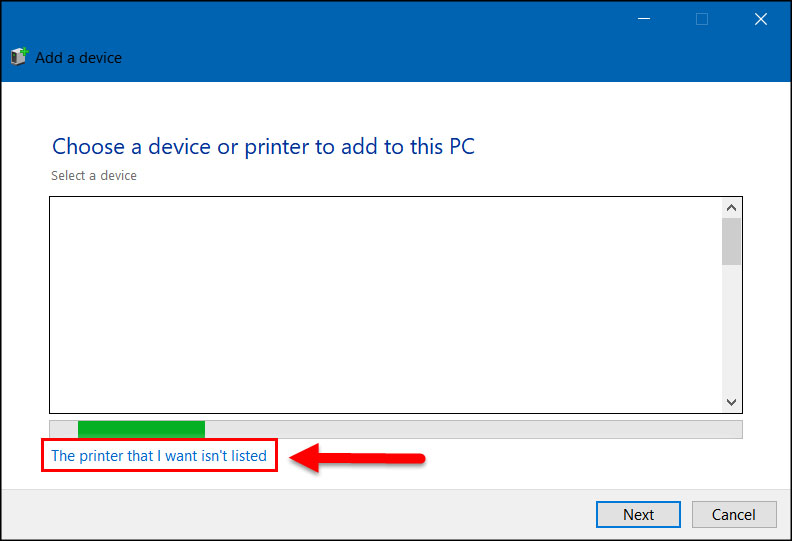
1. In Devices and Printers, click [Add a printer].

2. Click [The printer that I want isn't listed].
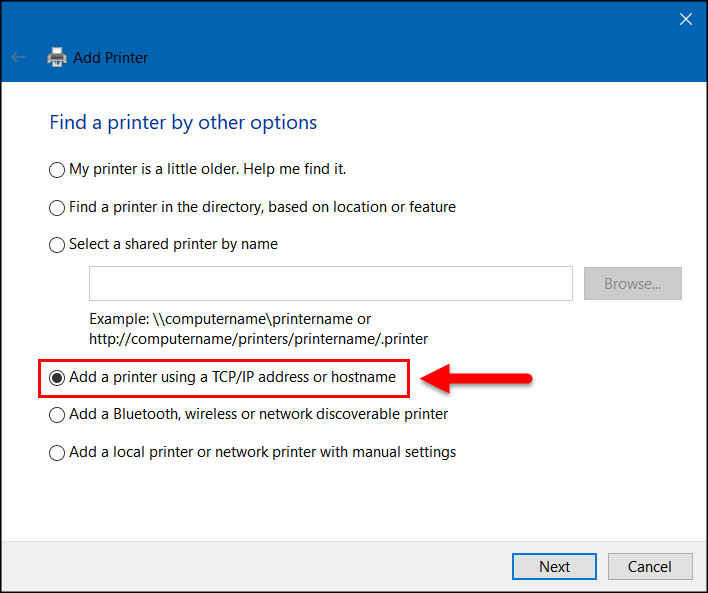
3. Click [Add a printer using a TCP/IP address or hostname].
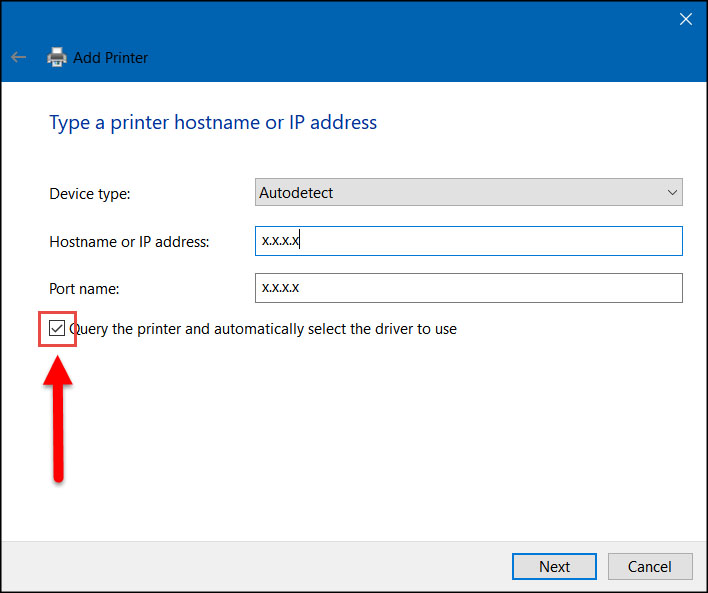
4. Add in either the FQDN or the IP address found in step one. Ensure that the box, "Query the printer and automatically select the driver to use" is ticked.
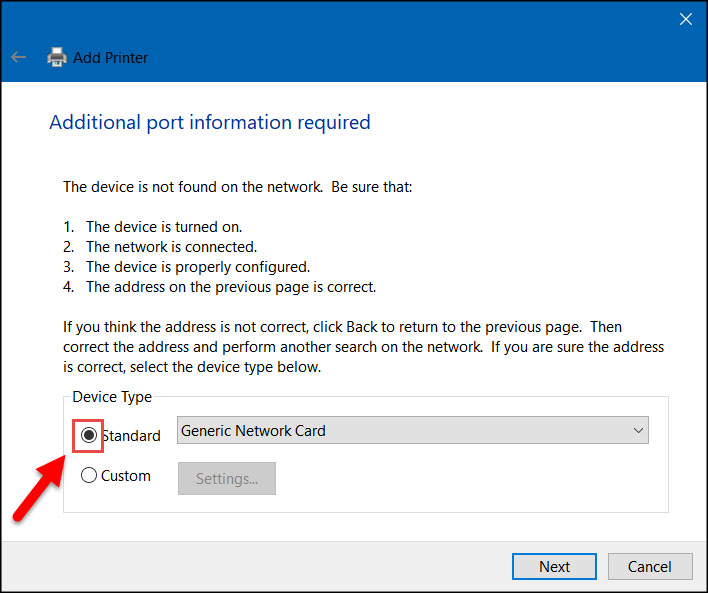
5. If you're prompted with this message, ensure Generic Network Card is selected and click [Next]. If you don't see this message, skip this step.
6. Using the information from the printer properties in step 1, select the manufacturer / model of the printer to assign the correct printer driver and click [Next]. Note: you may need to click [Have Disk...] and locate any drivers found on the Internet if the list of your printers are not found.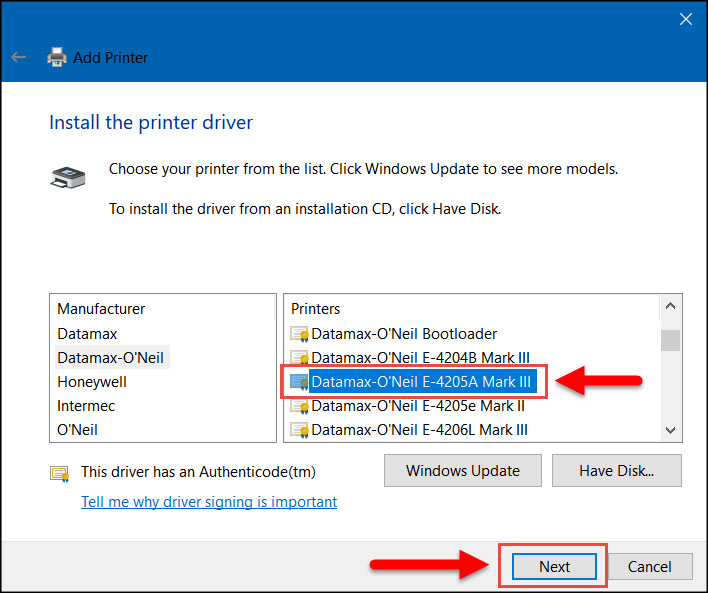
7. Select [Use the driver that is currently installed] and click [Next].
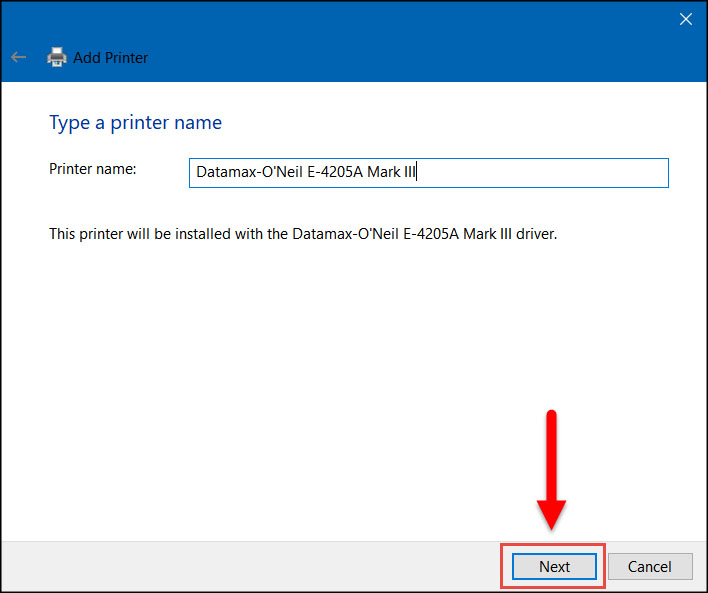
8. Give the printer a suitable name and click [Save].
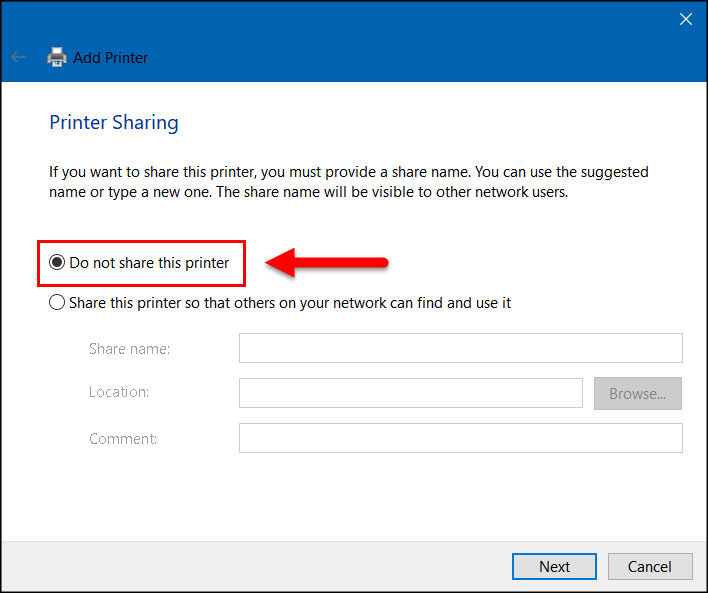
9. Select [Do not share this printer] and click [Next].
10. Ensure a test page can be printed, signifying the communication for this new local printer works.

11. Go back to Freman and add the new printer (see Adding your printers in Freman for more info). You may need to refresh your page to see the new printer.
Last Updated Date: May 7, 2021