How do I change the label size settings for my Zebra printer?
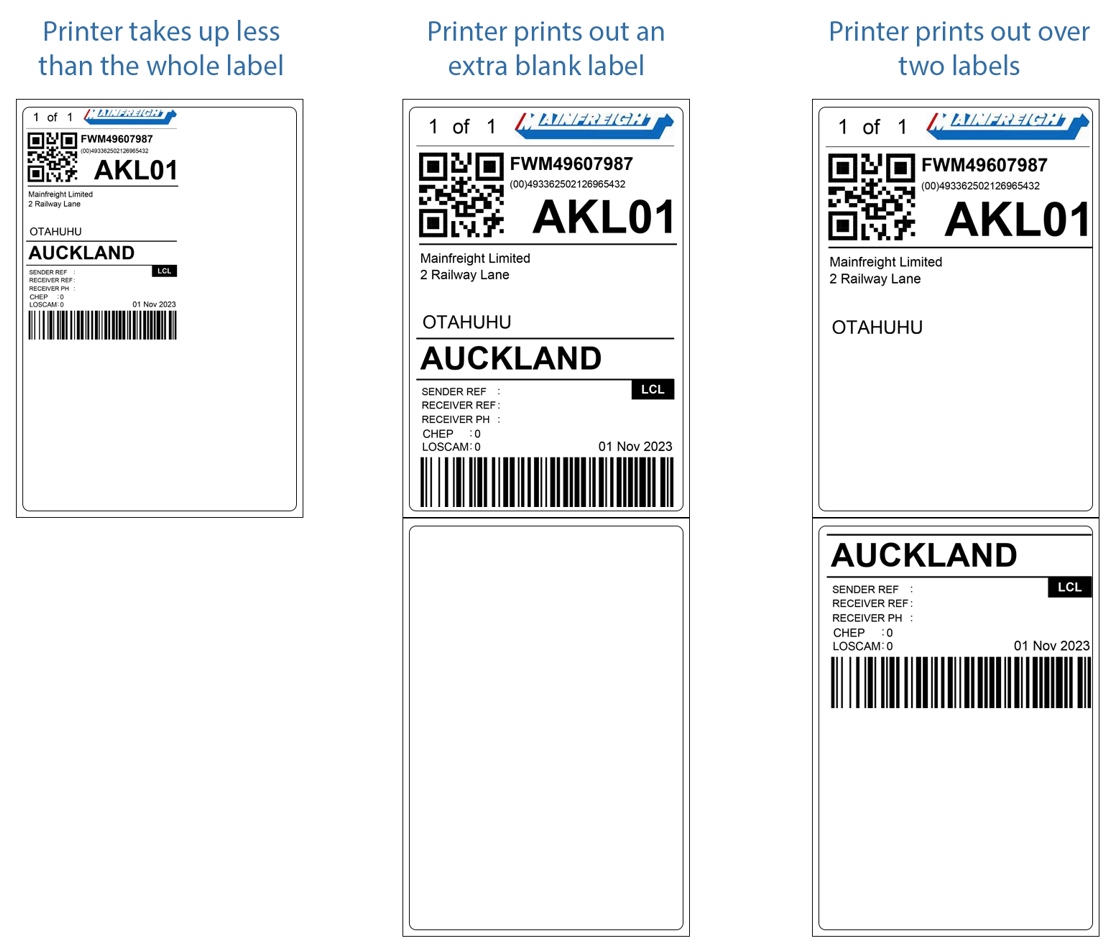
This article will apply to you if your Zebra printer:
- takes up less than the whole label.
- prints out an extra blank label.
- prints out over two labels.
Steps
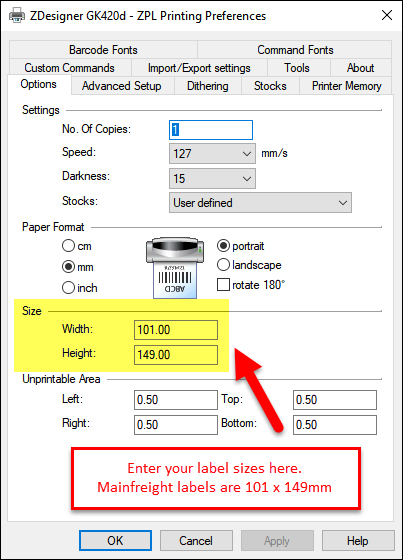
Before performing the steps below, you will need to know the width and height of your labels first. You can gather the measurements using a ruler or tape measure.
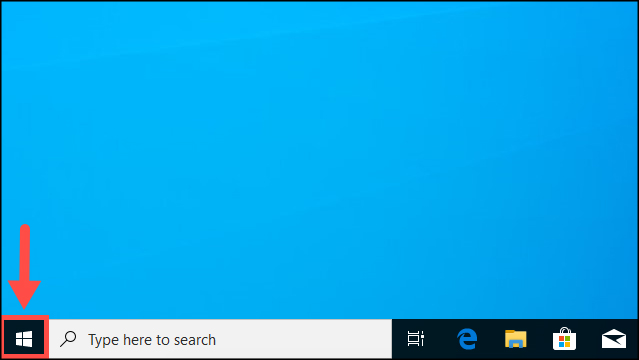
- For Windows 10
-
1. Click on the Windows start button.
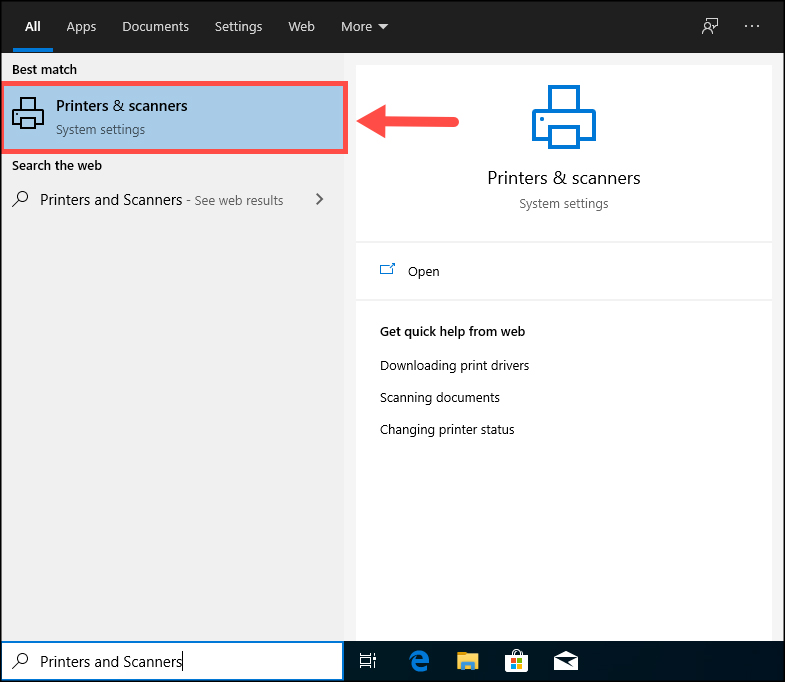
2. Type Printers and Scanners. Select the item in the search results to open the window.
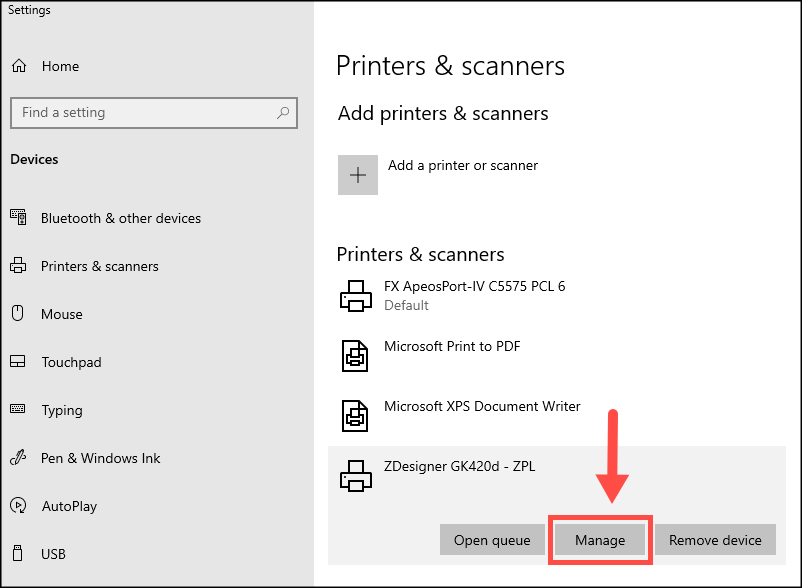
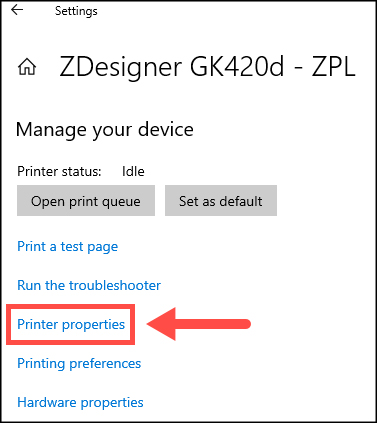
3. Select your Zebra printer in the list and click [Manage].
4. Click [Printer properties].
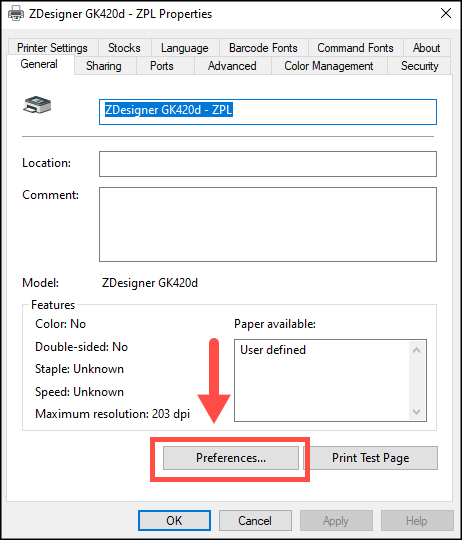
5. Click [Preferences...].
6. Under Size, change the label size to match with your thermal labels. You can change the unit under Paper Format, if required. Click [OK] once you are done changing the label sizes.
Additional Steps
You may also need to change the label size settings for your Zebra printer in the Printing Defaults section.
1. Click [Advanced].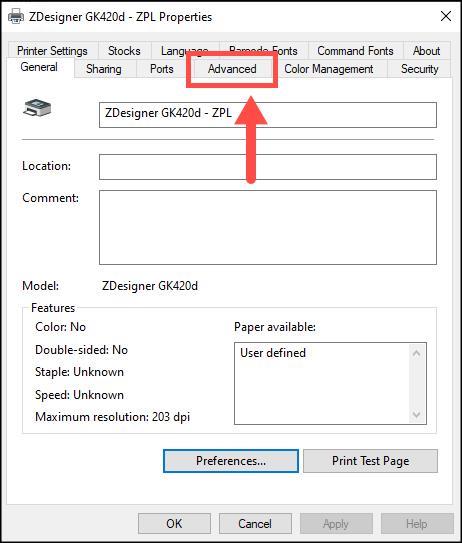
2. Click [Printing Defaults...].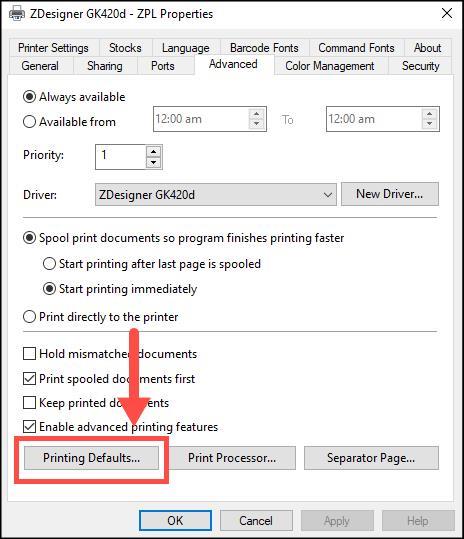
3, Under Size, change the label size to match with your thermal labels. You can change the unit under Paper Format, if required. Click [OK] once you are done changing the label sizes.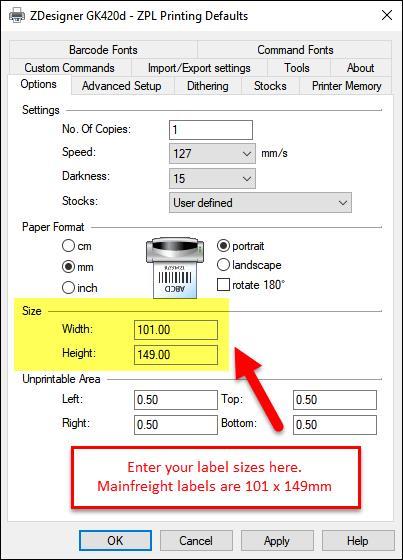
4. Click [OK] to exit the window. You've successfully changed the label size on your Zebra printer.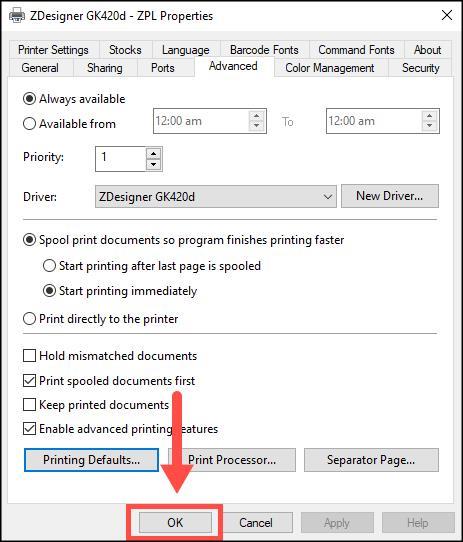
Last Updated: November 1, 2023