How do I change the label size settings for my Sato printer?
This article will apply to you if your Sato printer:
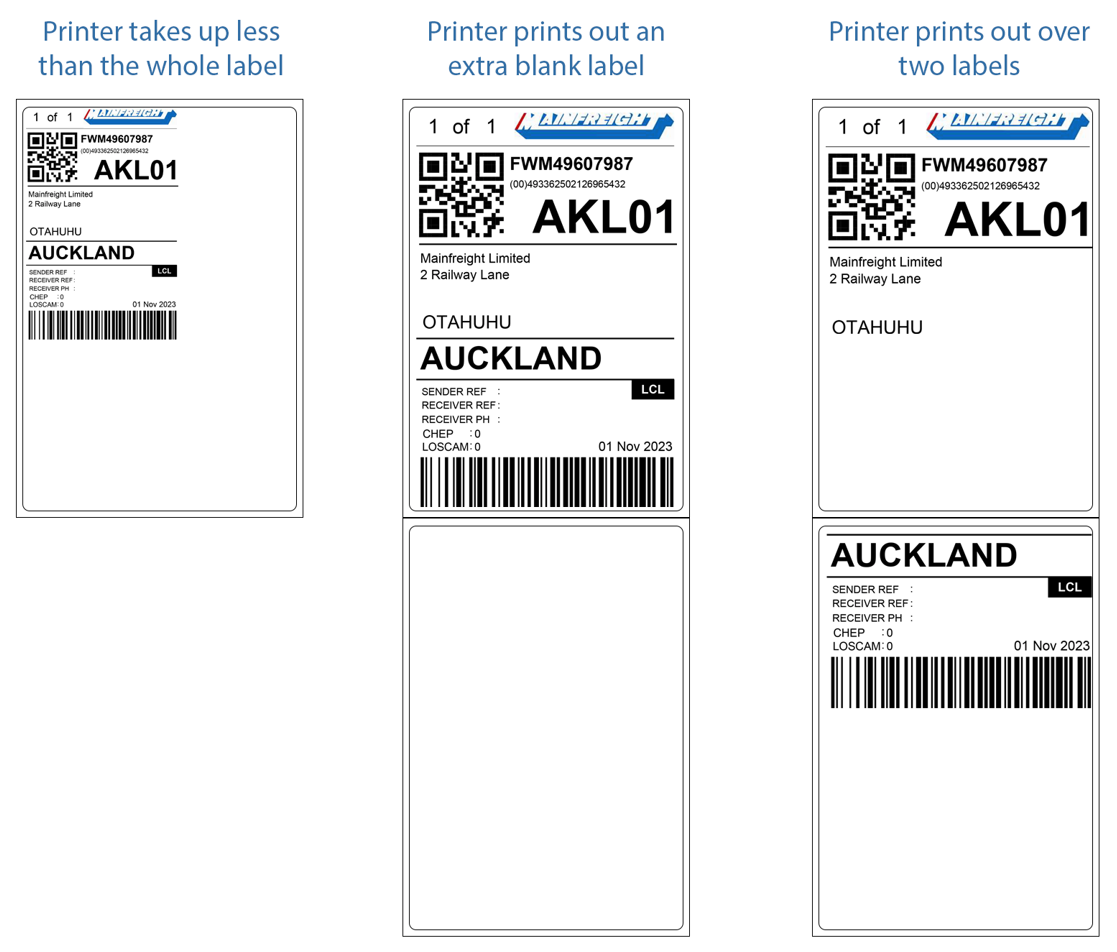
- takes up less than the whole label.
- prints out an extra blank label.
- prints out over two labels.
Steps
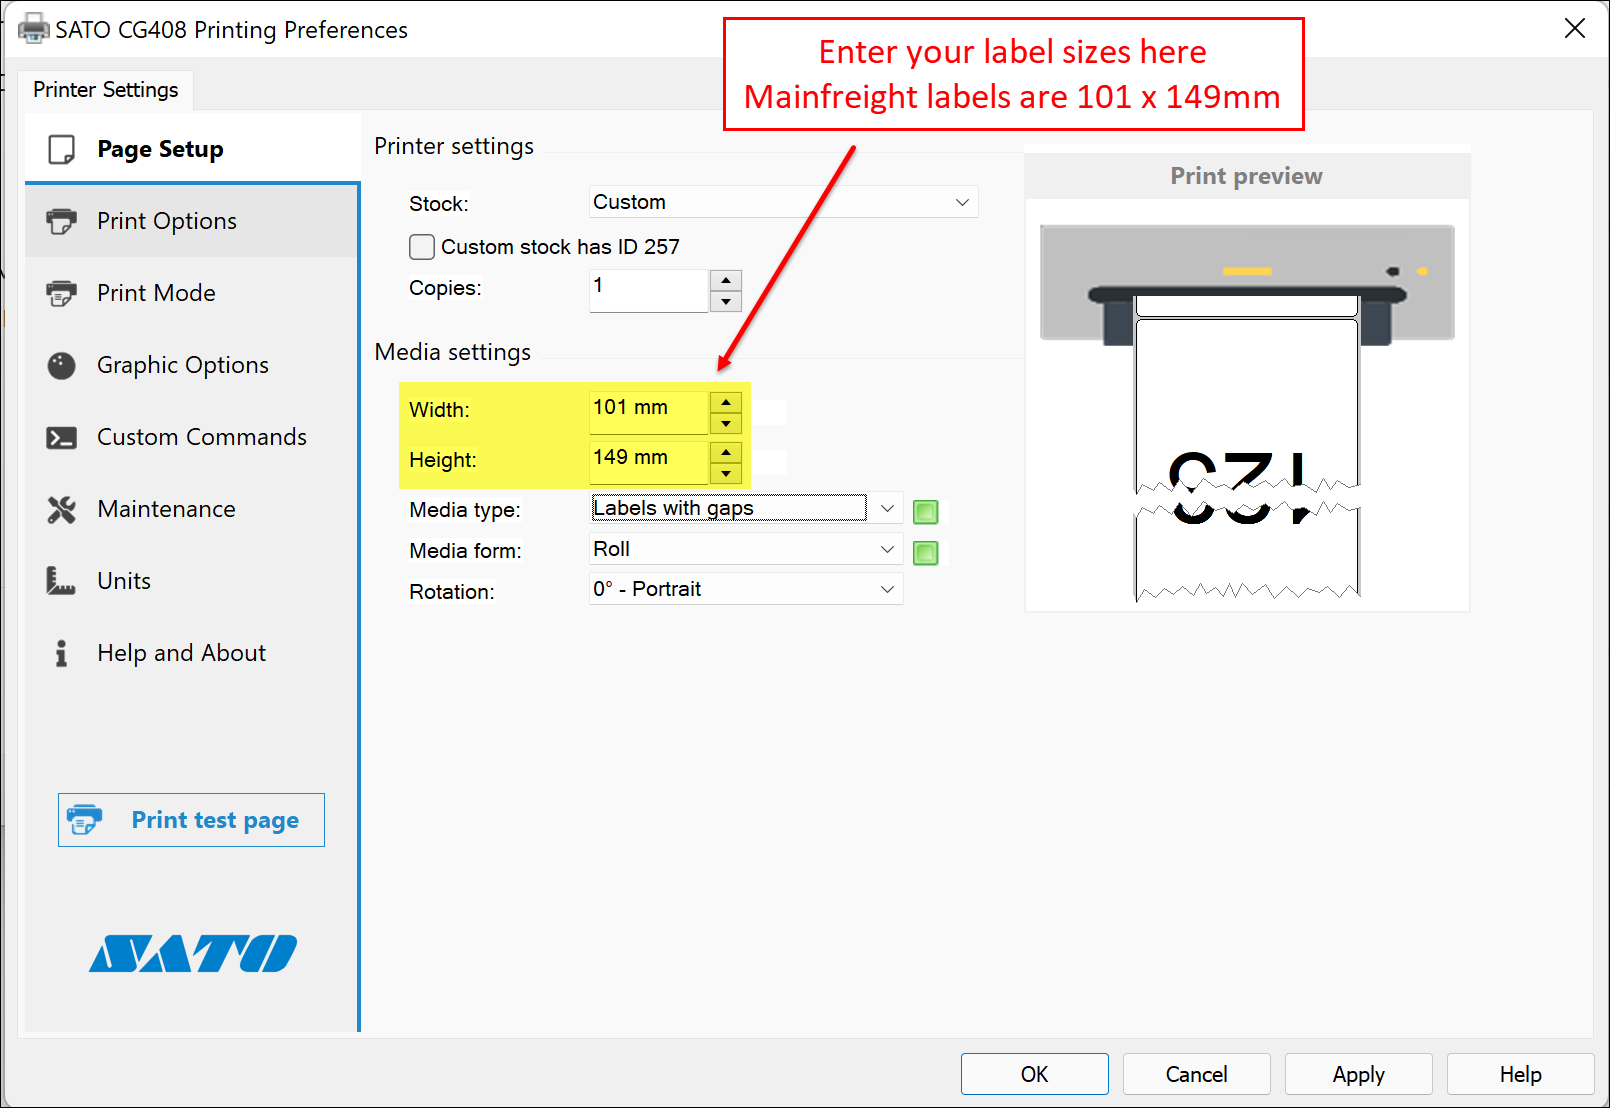
Before performing the steps below, you will need to know the width and height of your labels first. You can gather the measurements using a ruler or tape measure.
- For Windows 11
-
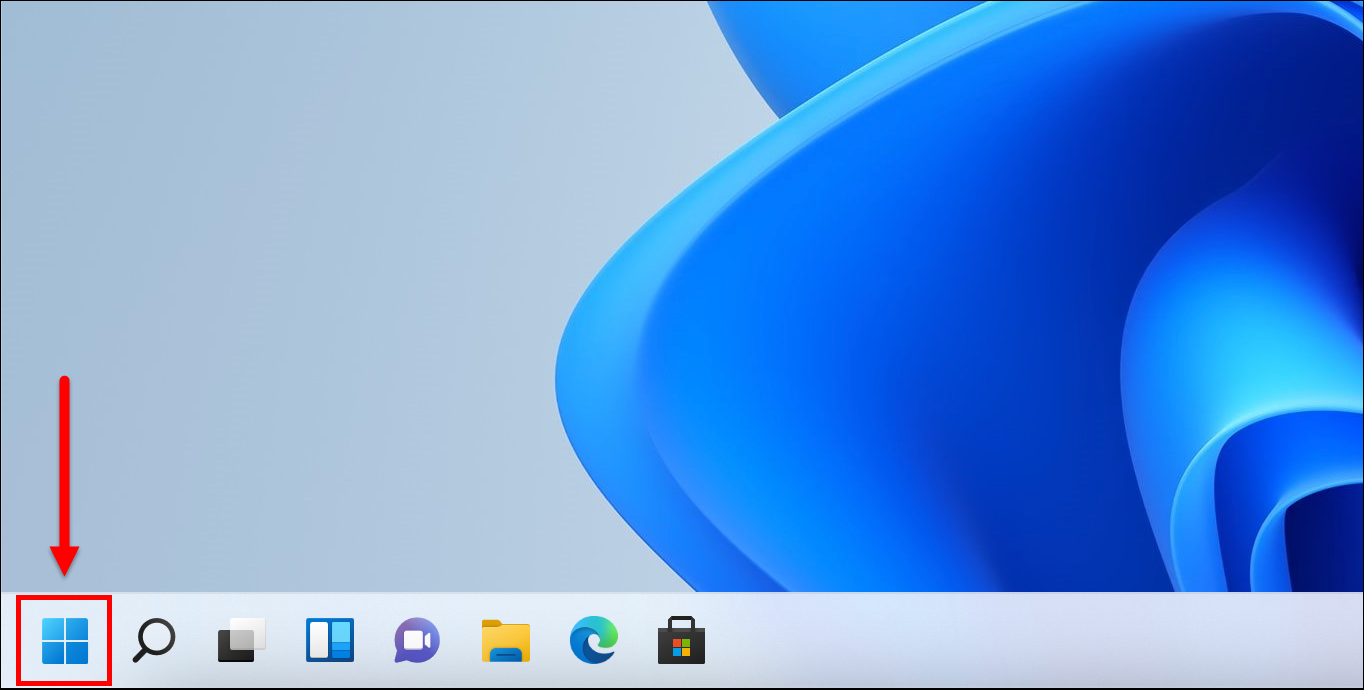
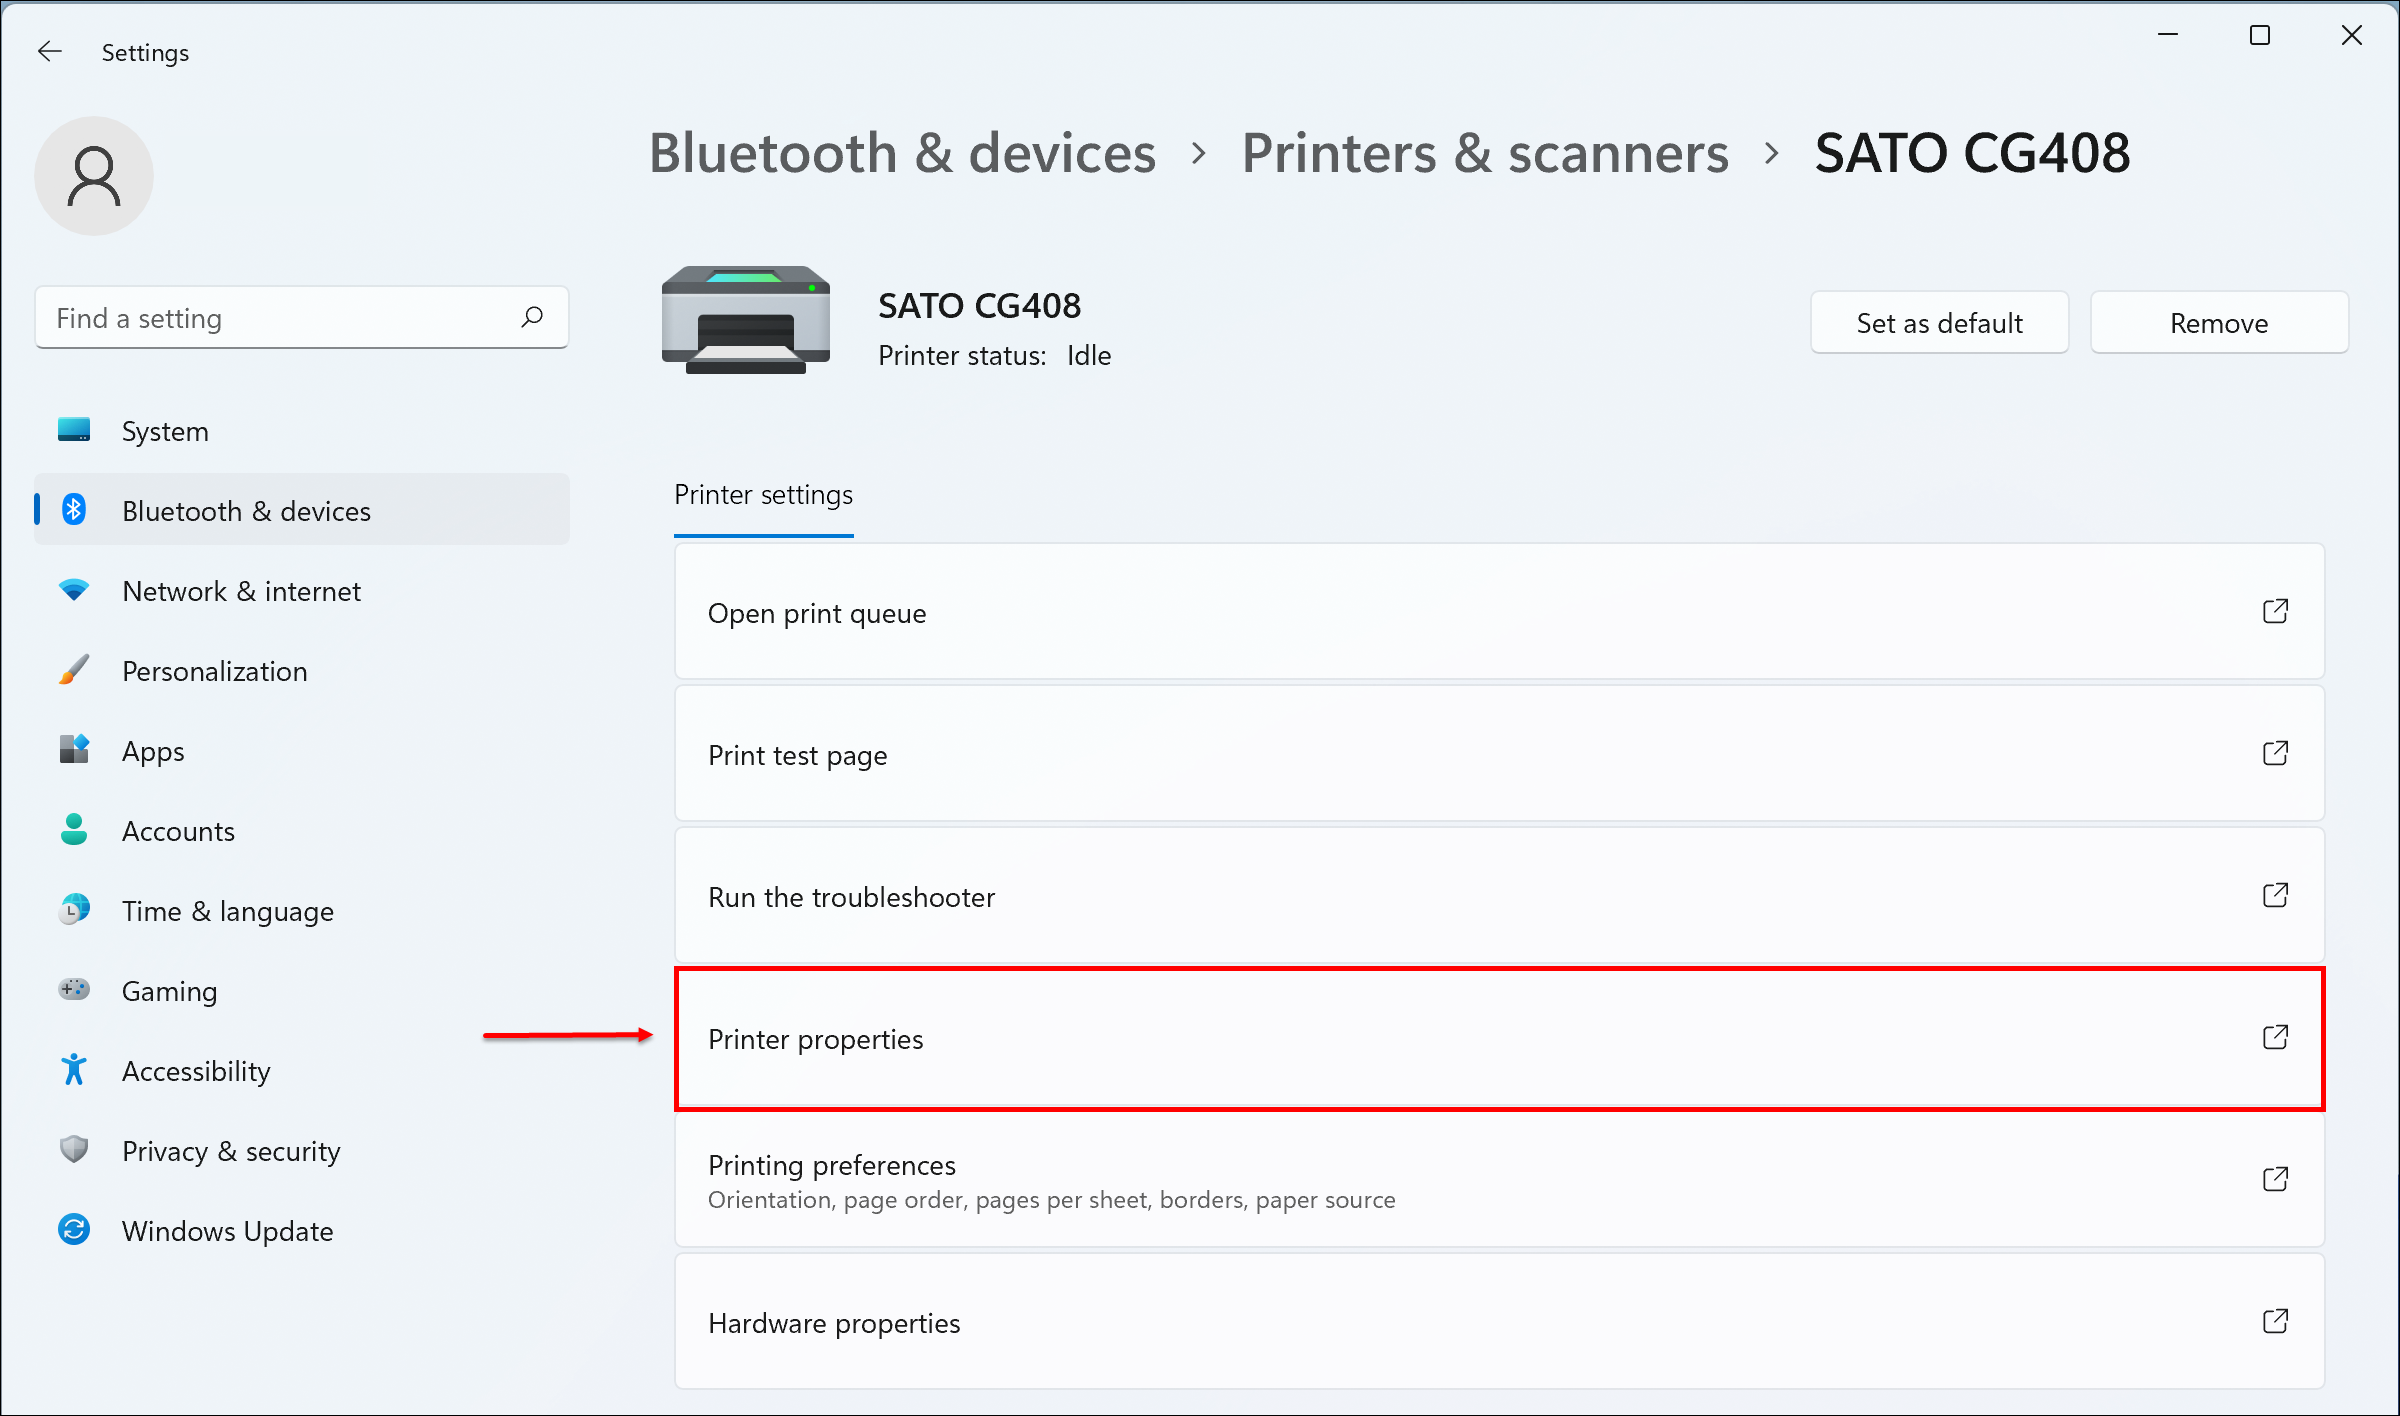
1. Click on the Windows start button.
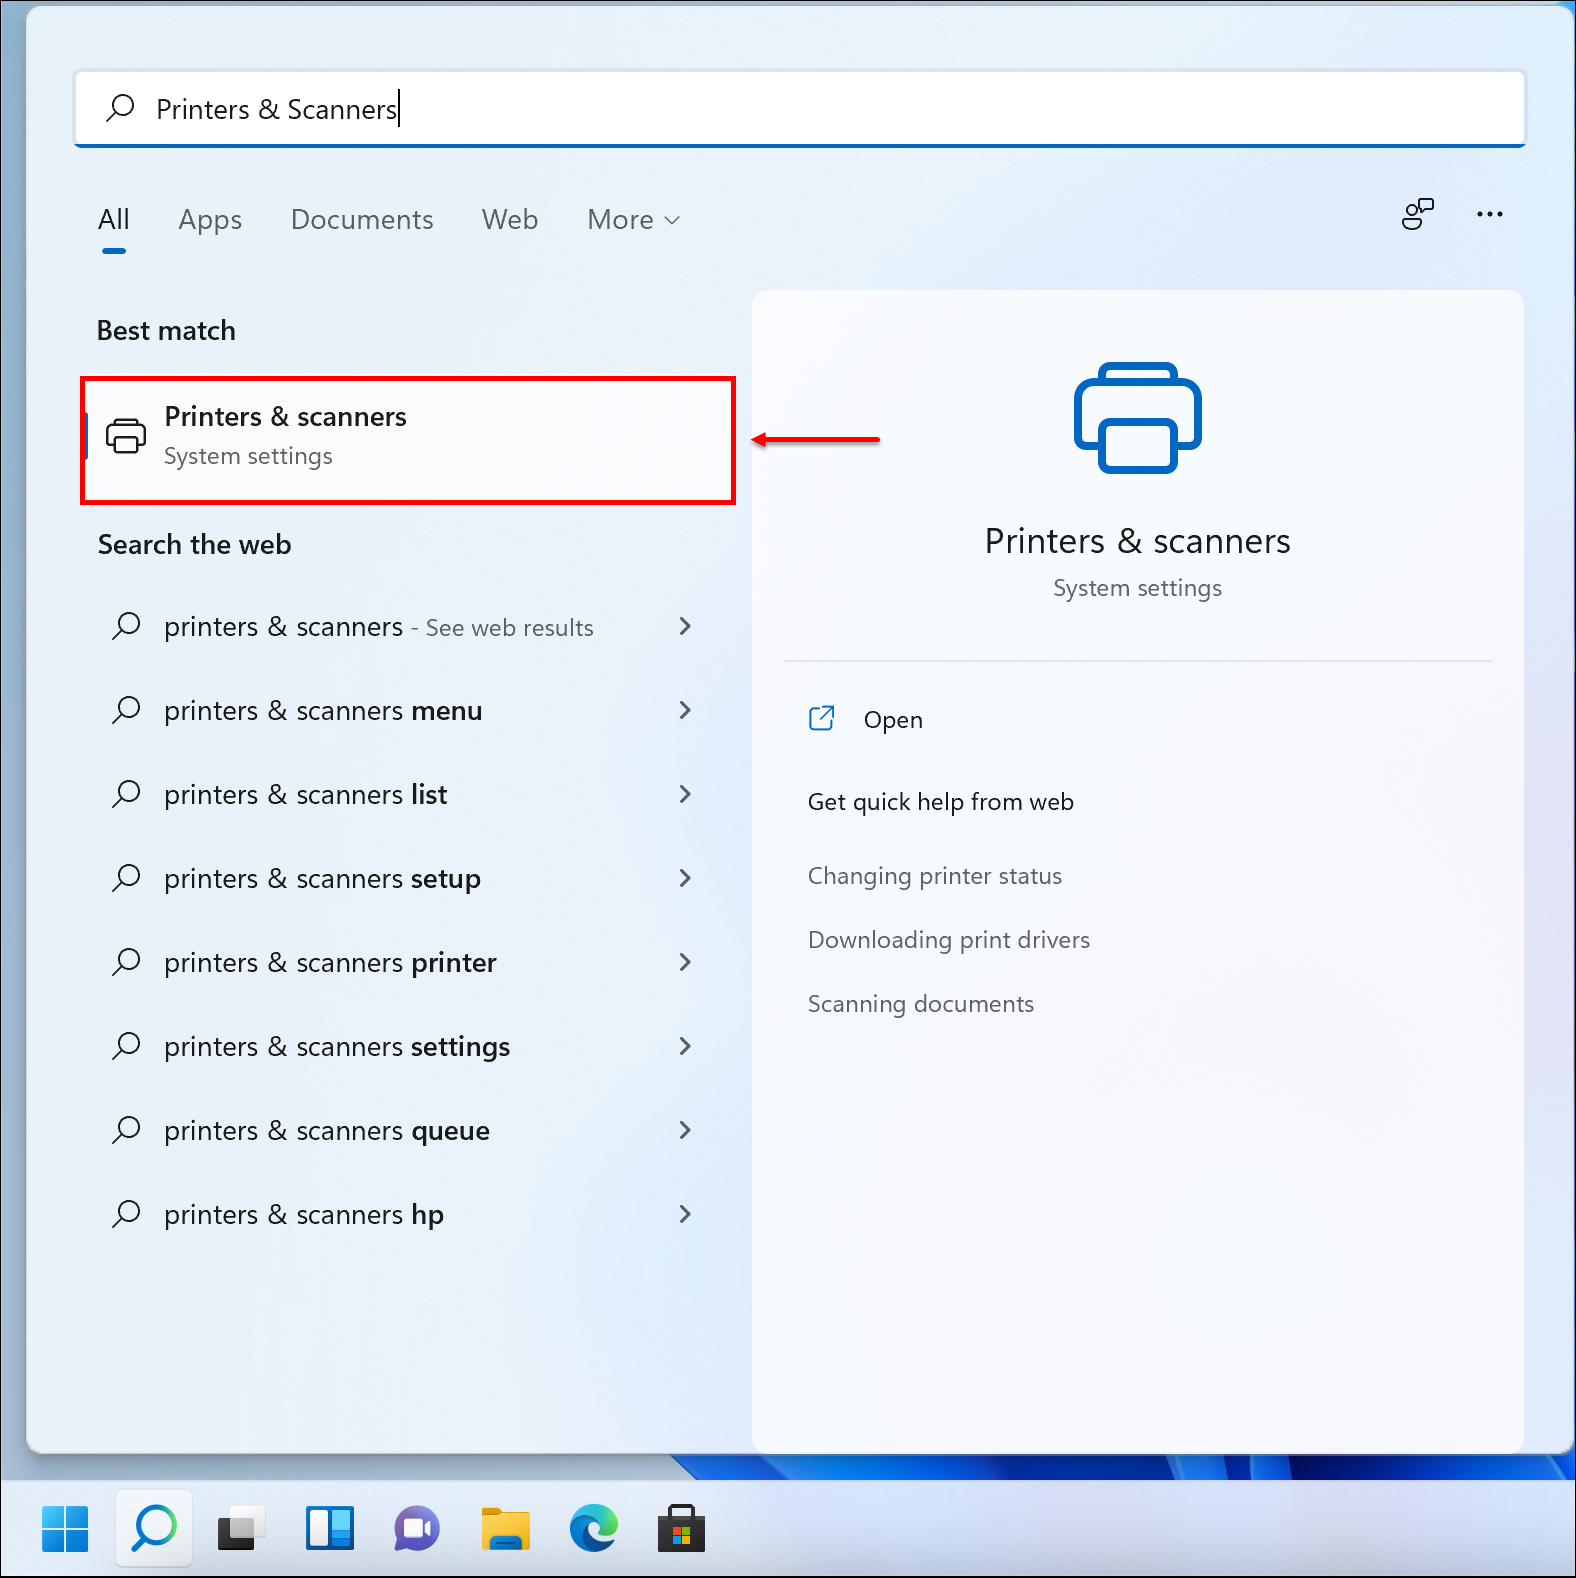
2. Type Printers & Scanners. Select the item that appears in the search results.
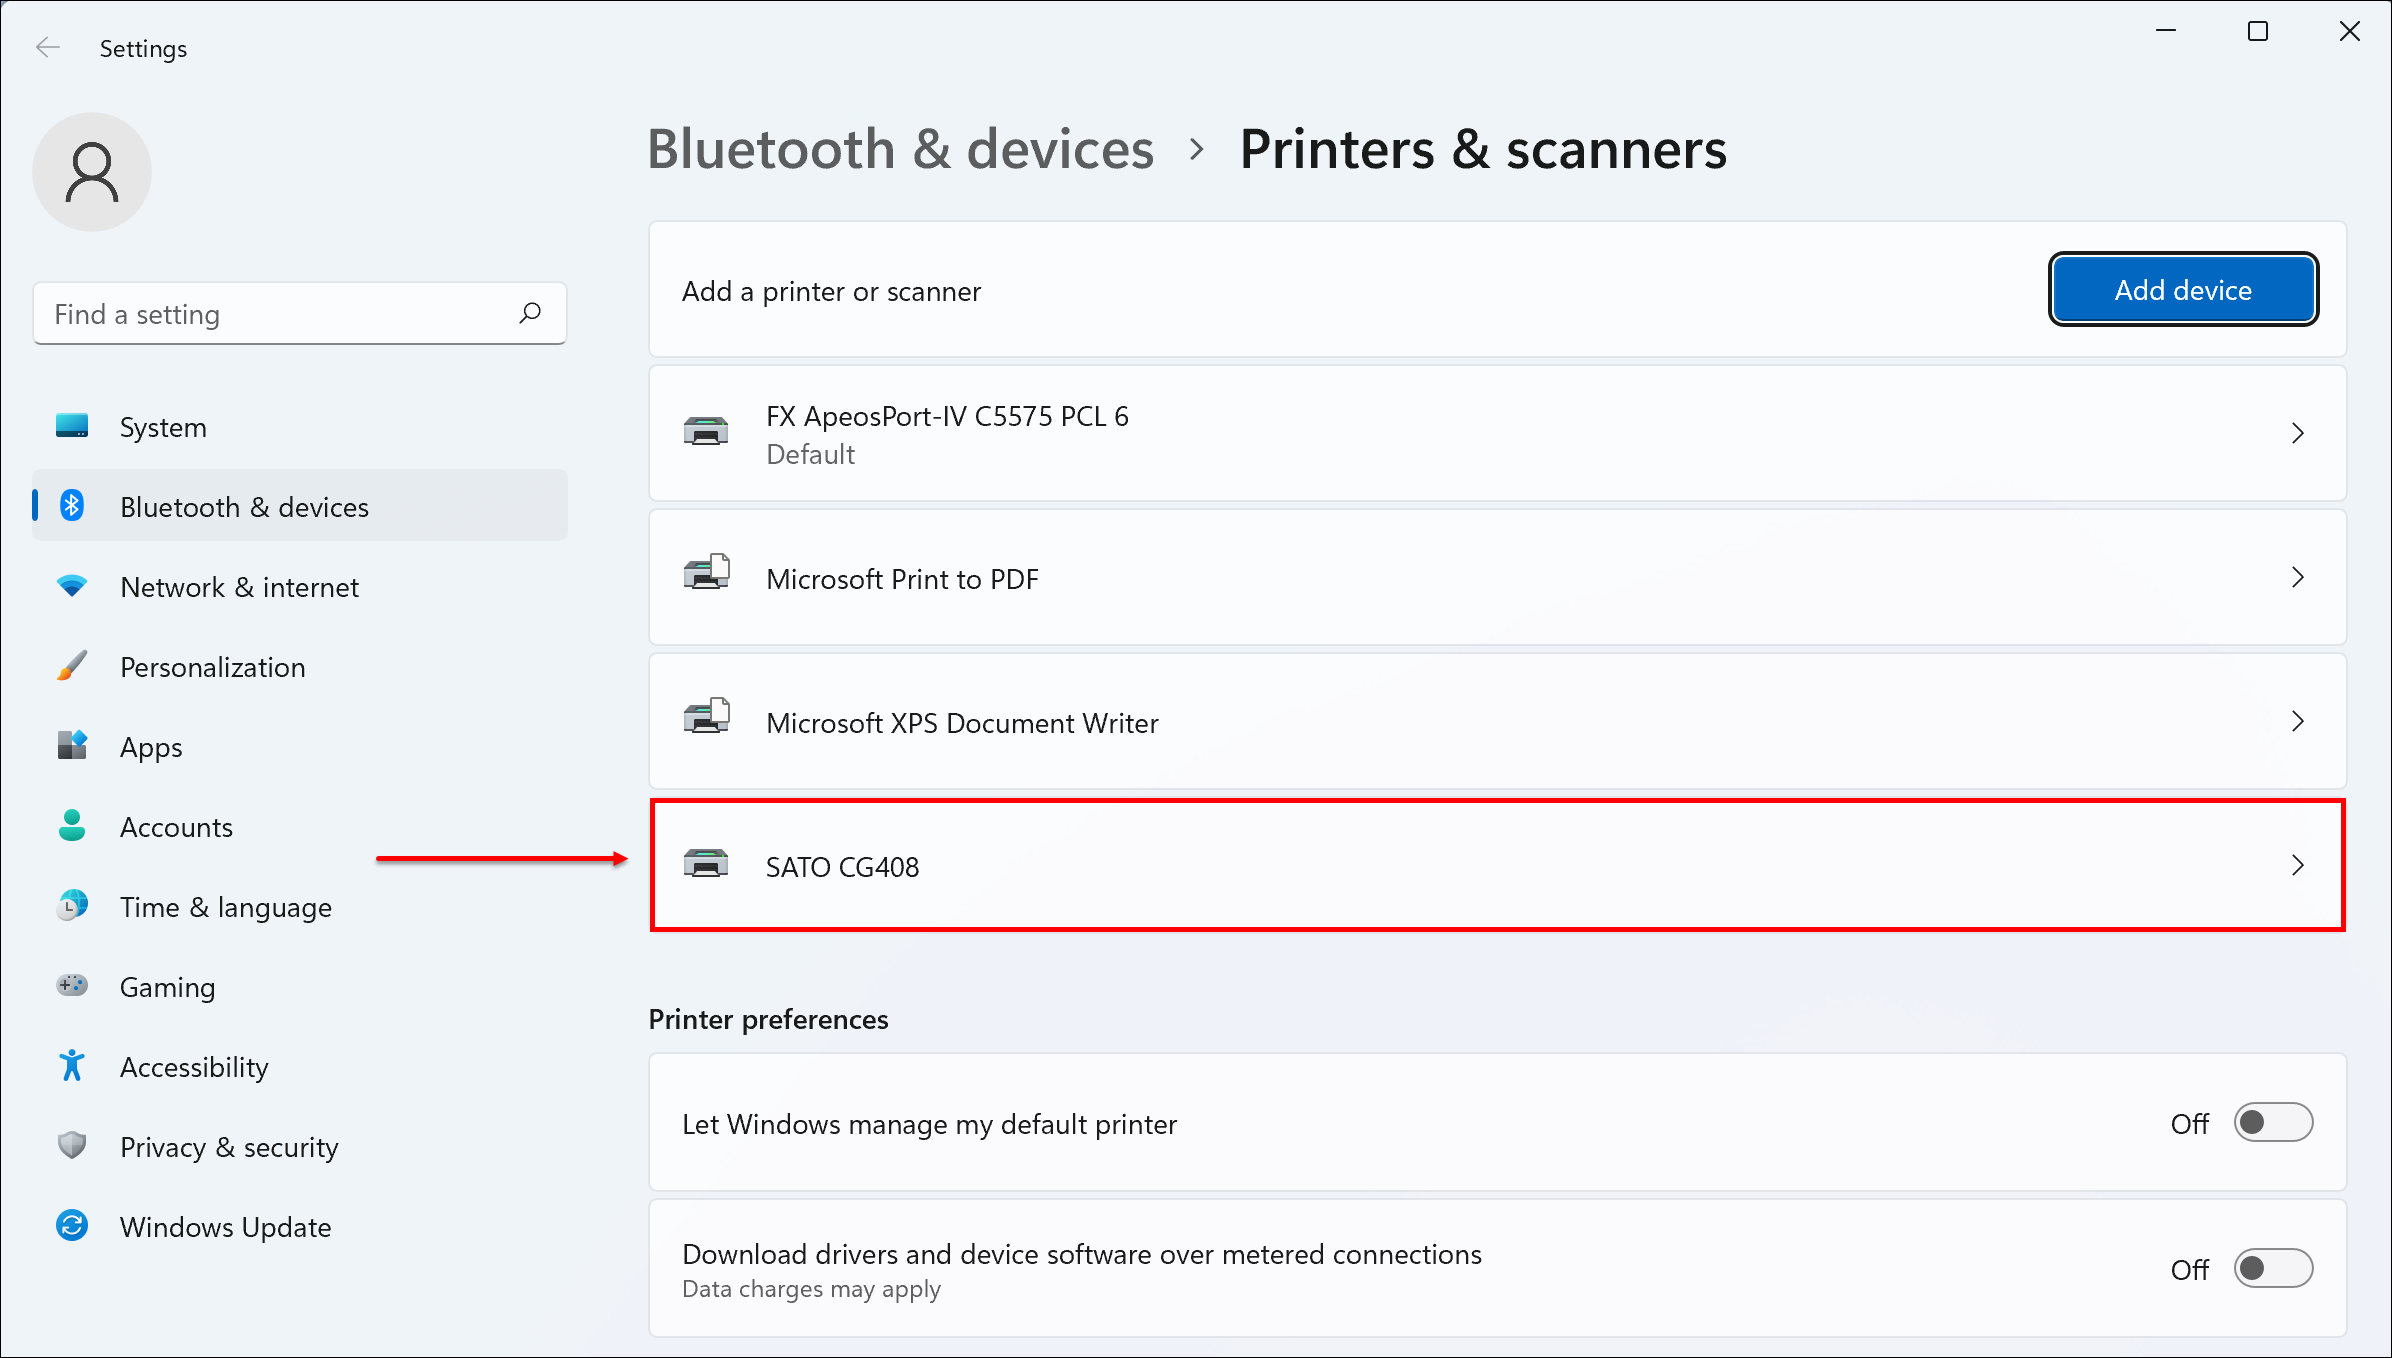
3. Select your Sato printer from the list and click on it.
4. Click [Printer properties].
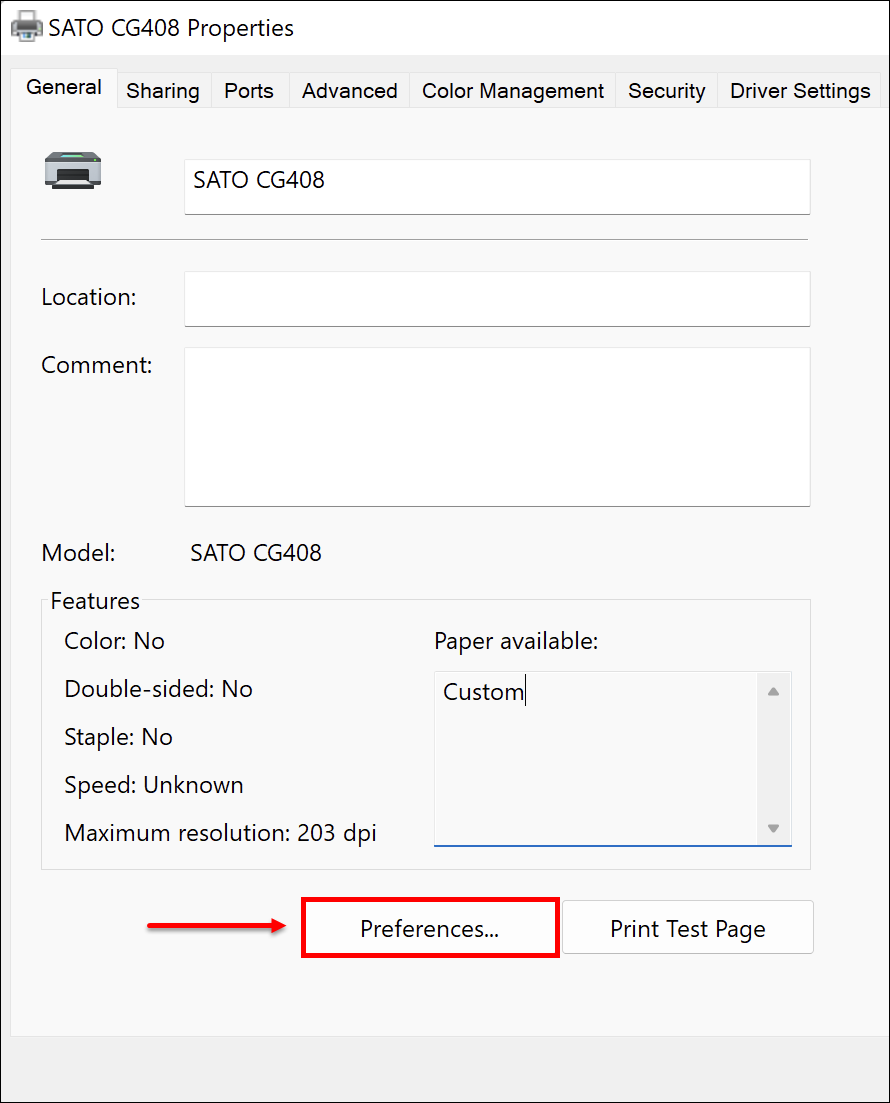
5. In the General tab, click [Preferences...].
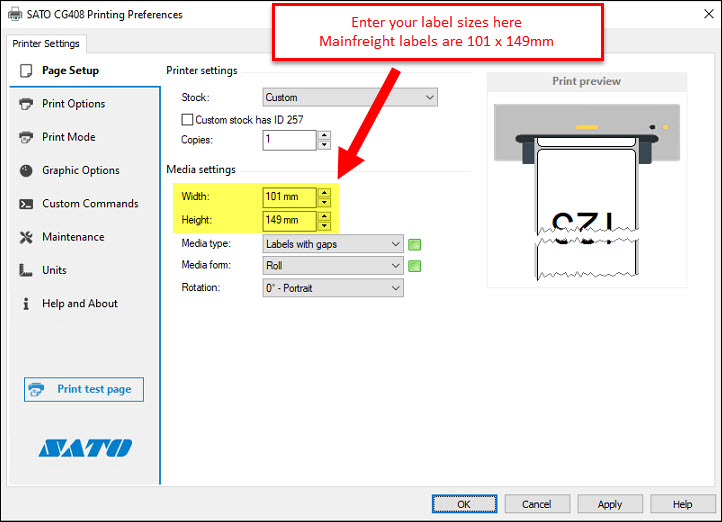
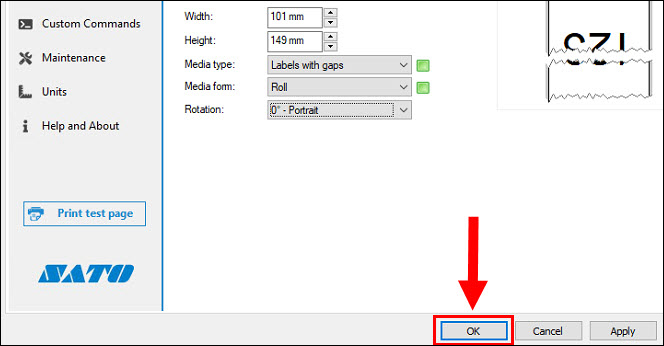
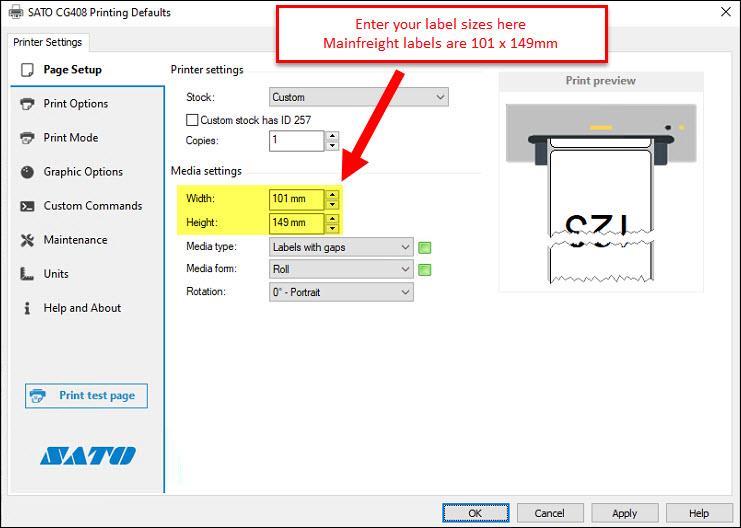
6. Under Media Settings, enter in the width and height of your labels. Note that Mainfreight labels are 101 mm (width) by 149 mm (height).
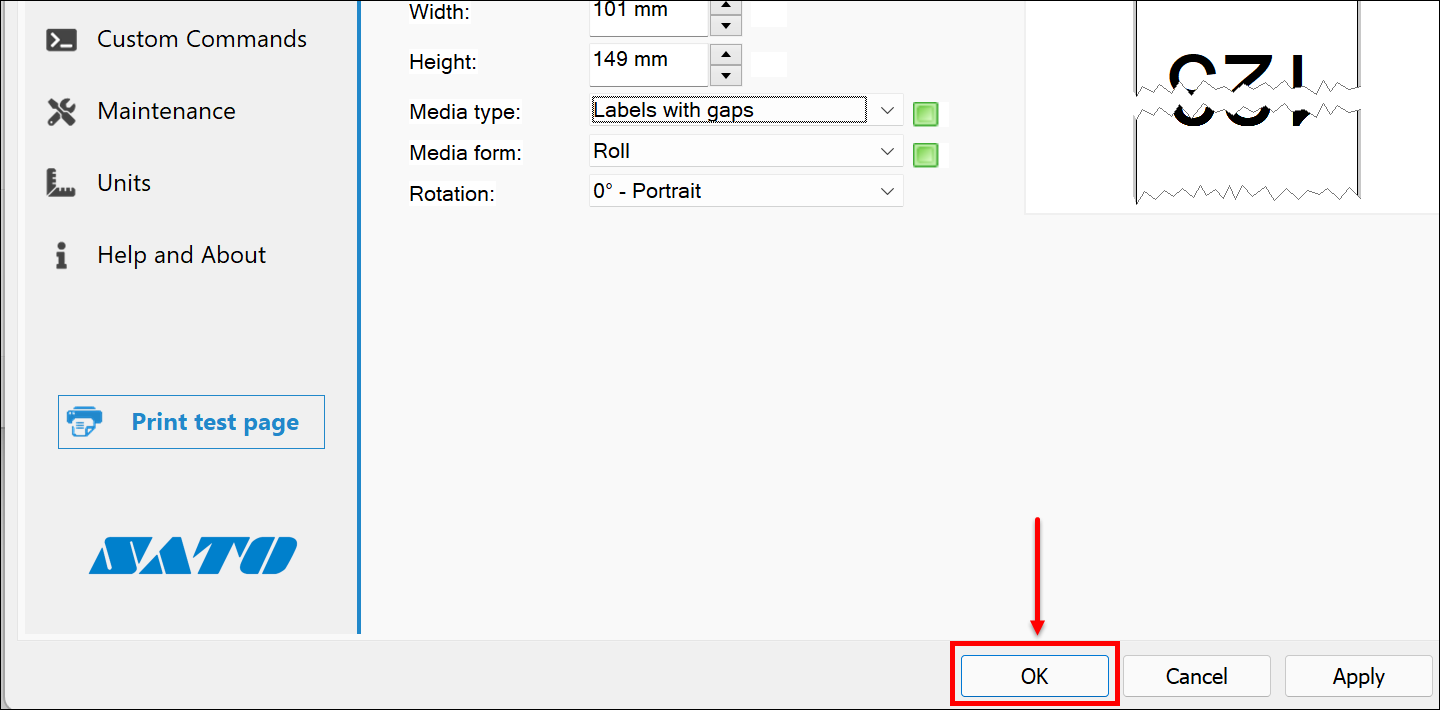
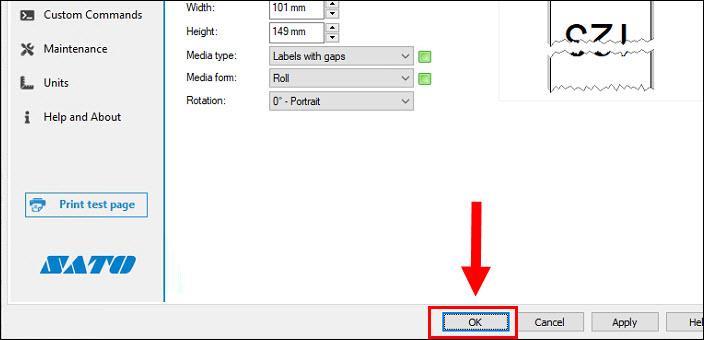
7. Click [OK] to apply the new changes.
- For Windows 10
-
1. Click on the Windows start button.
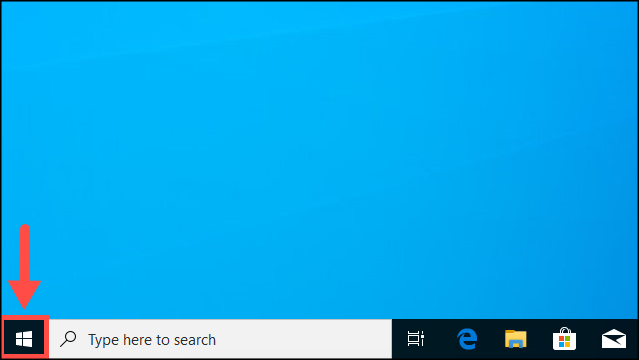
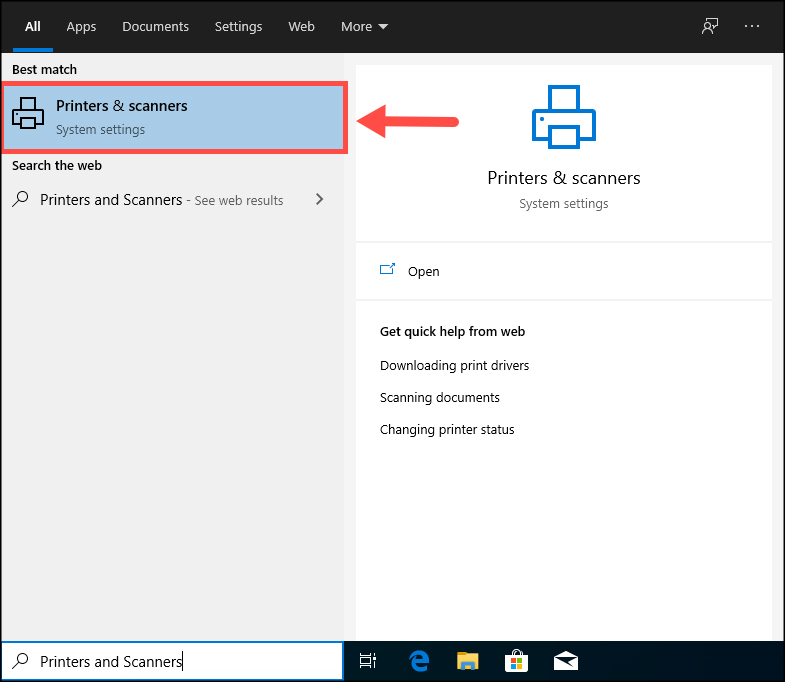
2. Type Printers & Scanners. Select the item which appears in the search results.
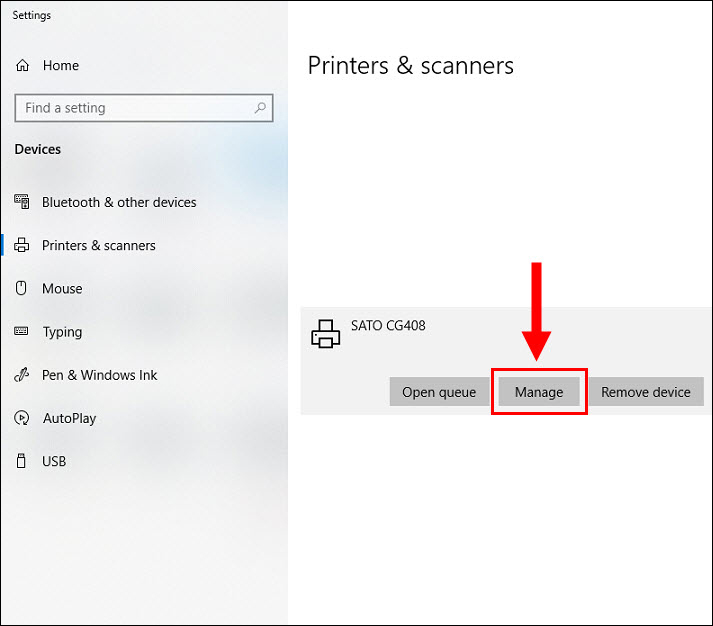
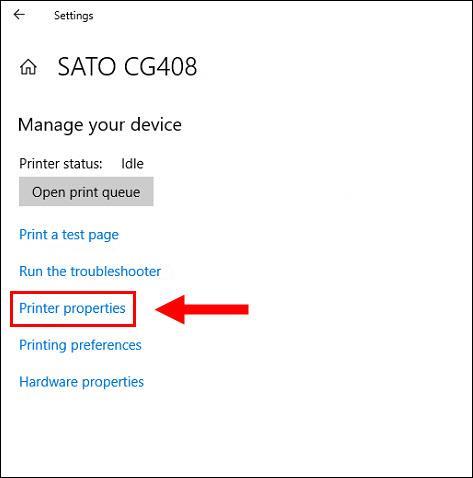
3. Select your Sato printer from the list and click [Manage].
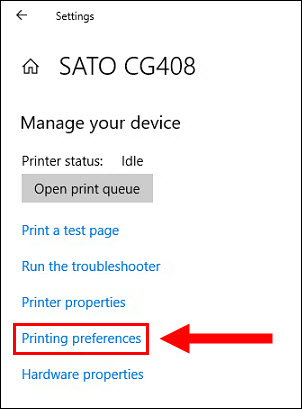
4. Click [Printing preferences].
5. Under Media Settings, enter in the width and height of your labels. Note that Mainfreight labels are 101 mm (width) by 149 mm (height).
6. Click [OK] to apply the new changes.
Additional Steps
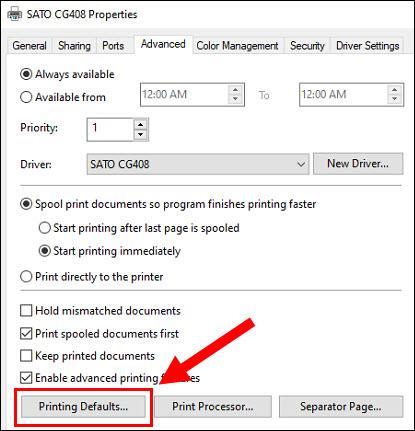
You may also need to change the label size settings for your Sato printer in the Printing Defaults section.
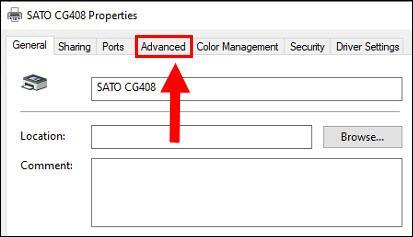
1. Click [Printer Properties].
2. Click [Advanced].
3. Click [Printing Defaults...].
4. Under Media Settings, enter in the width and height of your labels. Note that Mainfreight labels are 101 mm (width) by 149 mm (height).
5. Click [OK] to apply the new changes.
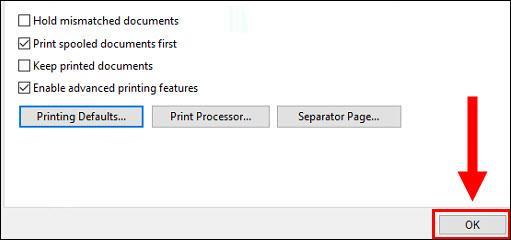
6. Click [OK] again to complete the process.
Last Updated: November 1, 2023