How do I change the label size settings for my Brother printer?
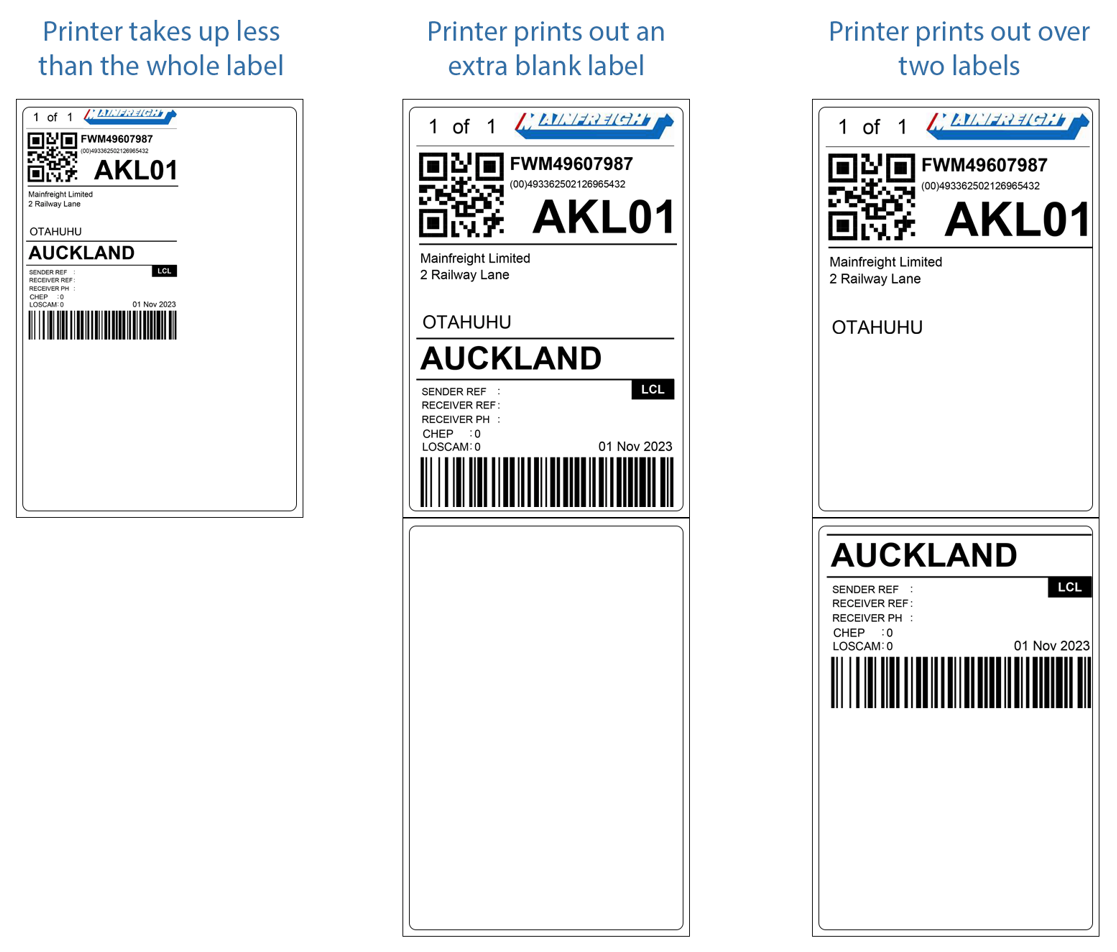
This article will apply to you if your Brother printer:
- takes up less than the whole label.
- prints out an extra blank label.
- prints out over two labels.
Steps
Before performing the steps below, you will need to know the width and height of your labels first. You can gather the measurements using a ruler or tape measure, however it assumes you have procured standard SSCC label sizing from your preferred supplier (100 x 150mm).
How do I change the label size setting for my Brother printer?
Click on the Windows [Start] button
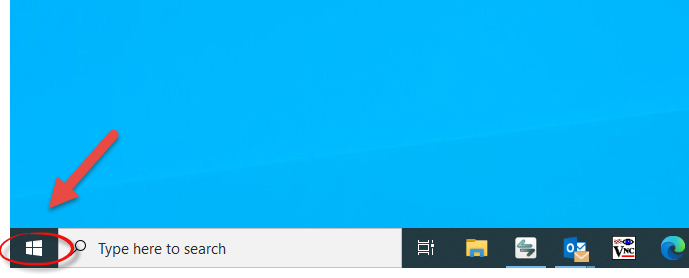
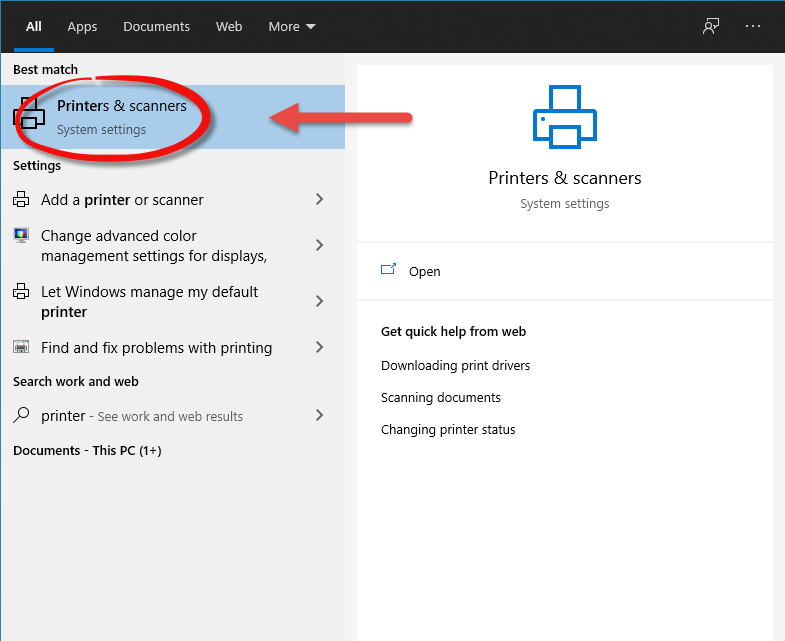
Type Printers and Scanners. Select the item in the search results to open the window.
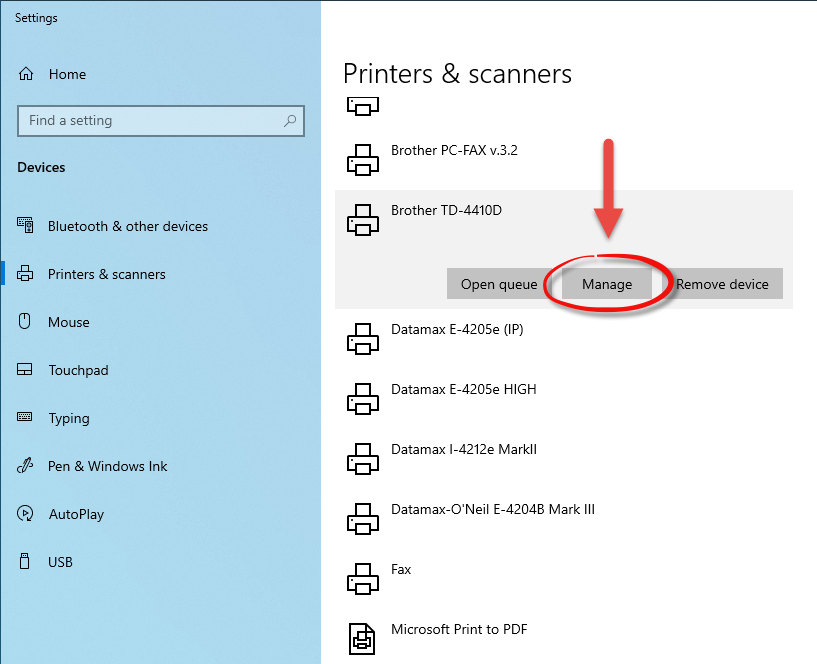
Select your Brother printer from the list and click [Manage].
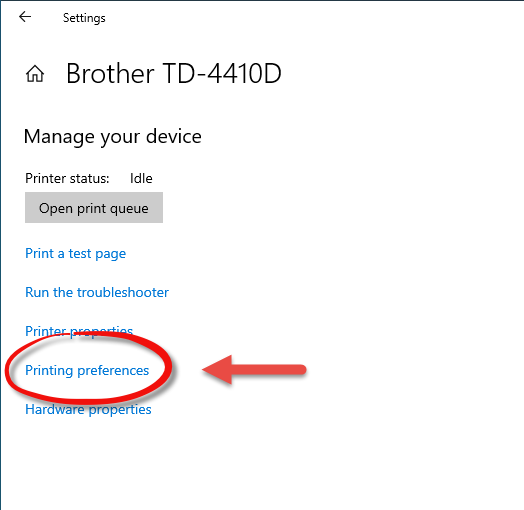
Click [Printer Preferences].
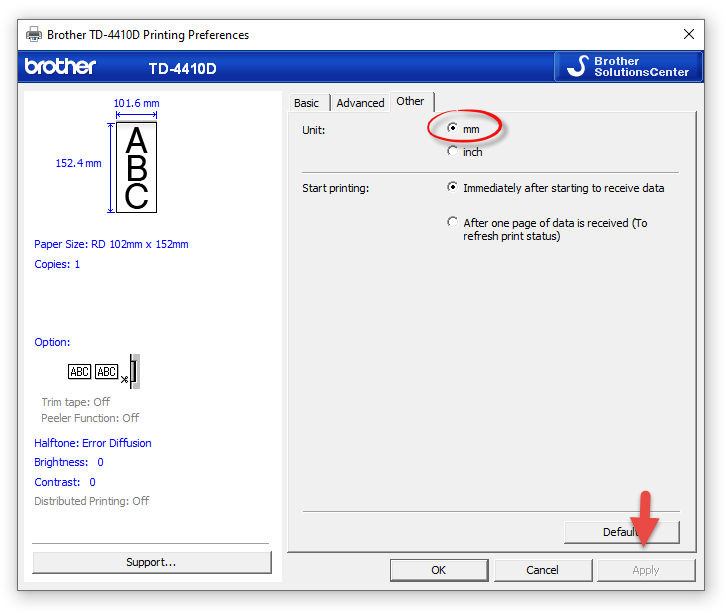
Click [Other] and change measurements to ‘mm’ and then apply.
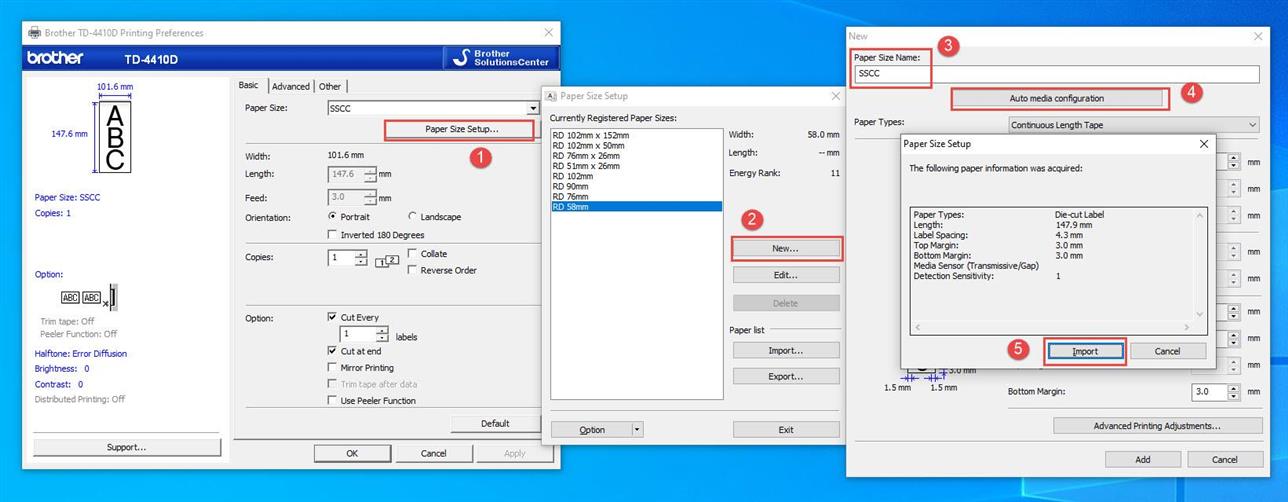
Back on the [Basic] tab, click on
1. Paper size setup
2. New
3. Give the stock a label name I.e. SSCC
4. Run the Auto Media Configuration
5. Import the data
Complete the information in the following way
7. Width and Height match SSCC sizing (i.e. 100mm width and 149mm height)
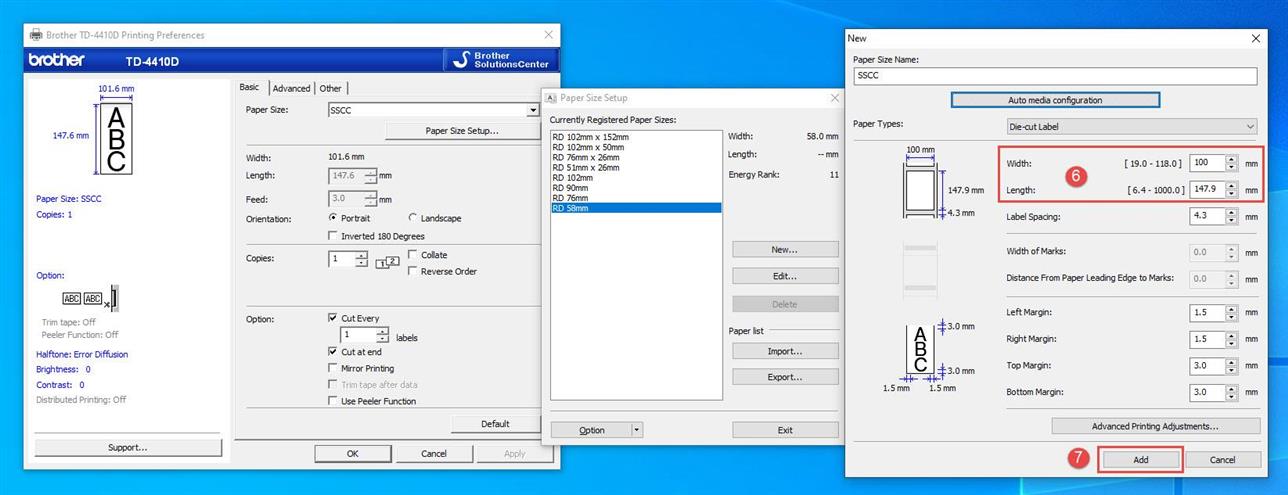
8. Confirm the new stock sizing has been saved by citing the ‘Registered’ paper sizes
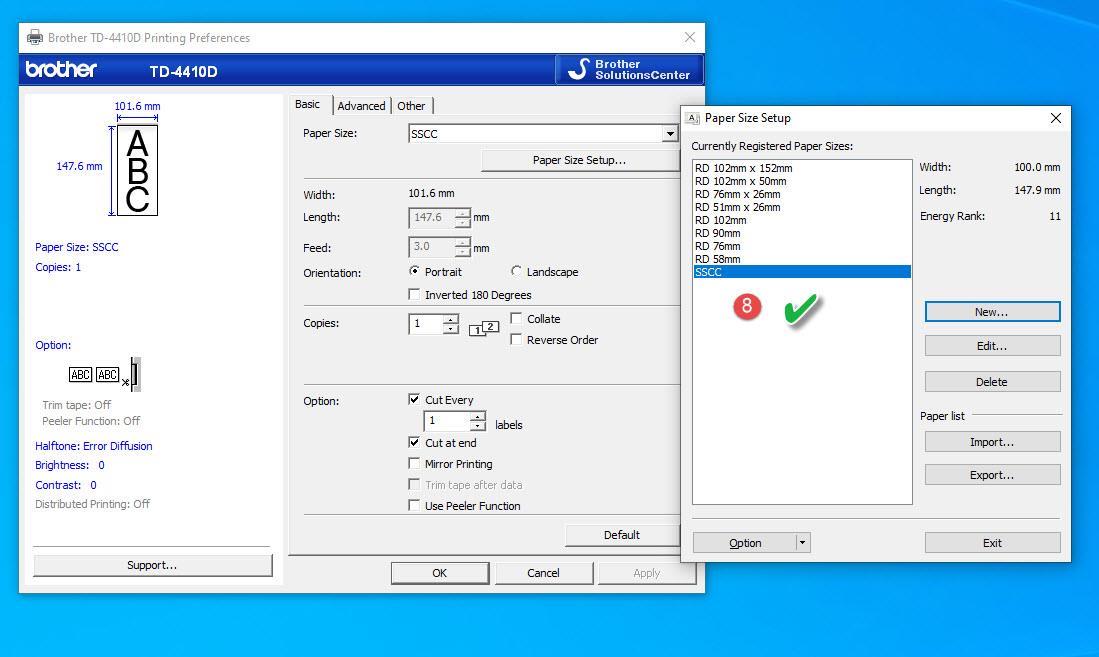
9. Select and Apply/Save the new Paper Size to complete the setup process.
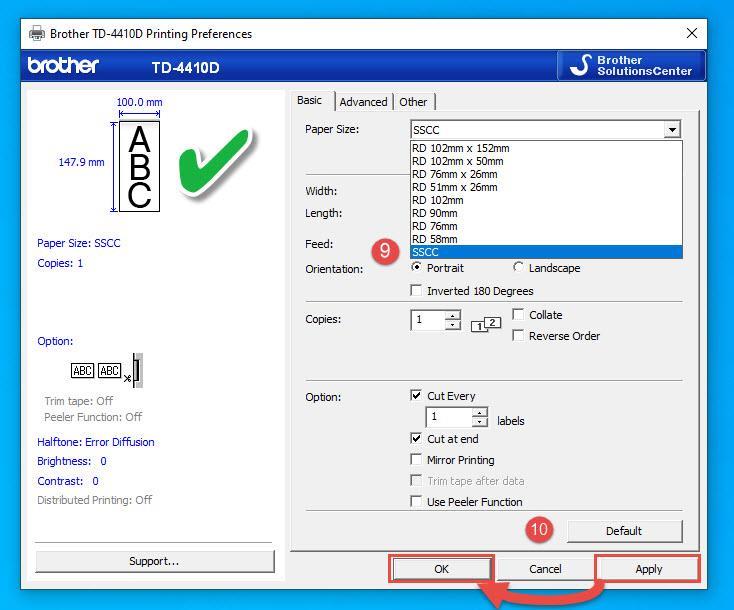
10. The printer now has the correct SSCC stock settings applied.
Next Steps
- Now in Freman online, so long as MPT is running, the best language to select for versatility of Transport and Courier output is the ZPL language

